Welcome to Moda!
Oasis by 3 sisters
Oasis by 3 sisters
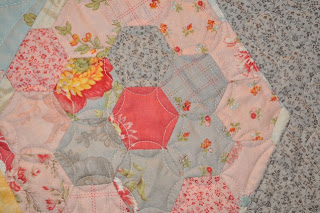
This quilt is available as a quilt kit packaged in a lunchbox sized tin. It contains fabric for the quilt top, pk of paper pieces, step by step directions and binding fabric. Backing and floss additional. add as much embroidery and applique to personalize your Oasis quilt. This quilt is a perfect project for a 3 or 4 week class. A rough outline of topics to cover each week is listed below.
WEEK 1: Make mini hexagons using the mini charm packs and paper pieces. Talk about the history of paper piecing. Show how to make Y seams as the hexagons are joined together.
Here are a few references for English paper piecing:
http://www.womenfolk.com/quilt_pattern_history/mosaic.htm
http://www.statemuseumpa.org/quilts05new/pages/glossary/9english.htm
I also have a post on my blog that shows the steps and the notions you may
want to feature as add on sales.
Demo applique using your preferred method on a layer cake square.
Homework: Complete 3 mini hexagon flowers and 2 applique blocks.
WEEK 2:
Teach embroidery techniques. Show needles, floss, transfer-eze etc.
Add embroidery stitches to applique pieces. Continue working on applique and embroidery pieces. Complete as many as possible before week 3's class.
WEEK 3:
Cut large hexagons using hexagon ruler, Stock # 8060.
ACCUQUILT may have a new Hexagon die that is perfect for moda's layer cakes. I will let you know as soon as I hear the details. How great would that be?
Mark 1/4" away from the edge at each of the corners. This will be your stopping and starting point. Line up 2 hexagons, sew in a few stitches from the marked spot, then backstitch to hold this seam in place being careful not to sew inot the 1/4" opening. You will need this to set in the next hexagon. Demo joining the large hexagons by machine. The basic same technique is used when sewing the hexs by hand but you will be using a machine.
Continue sewing hexagons into sections. This step becomes easier and easier with practice, however it does become cumbersome to handle as the quilt top gets larger. Pressing as you go makes the top more managable.
If your class is schelduled for 3 sessions, demo sewing the border on.
If class meets for a fourth time, the borders can be done then.


Comments