Welcome to Moda!
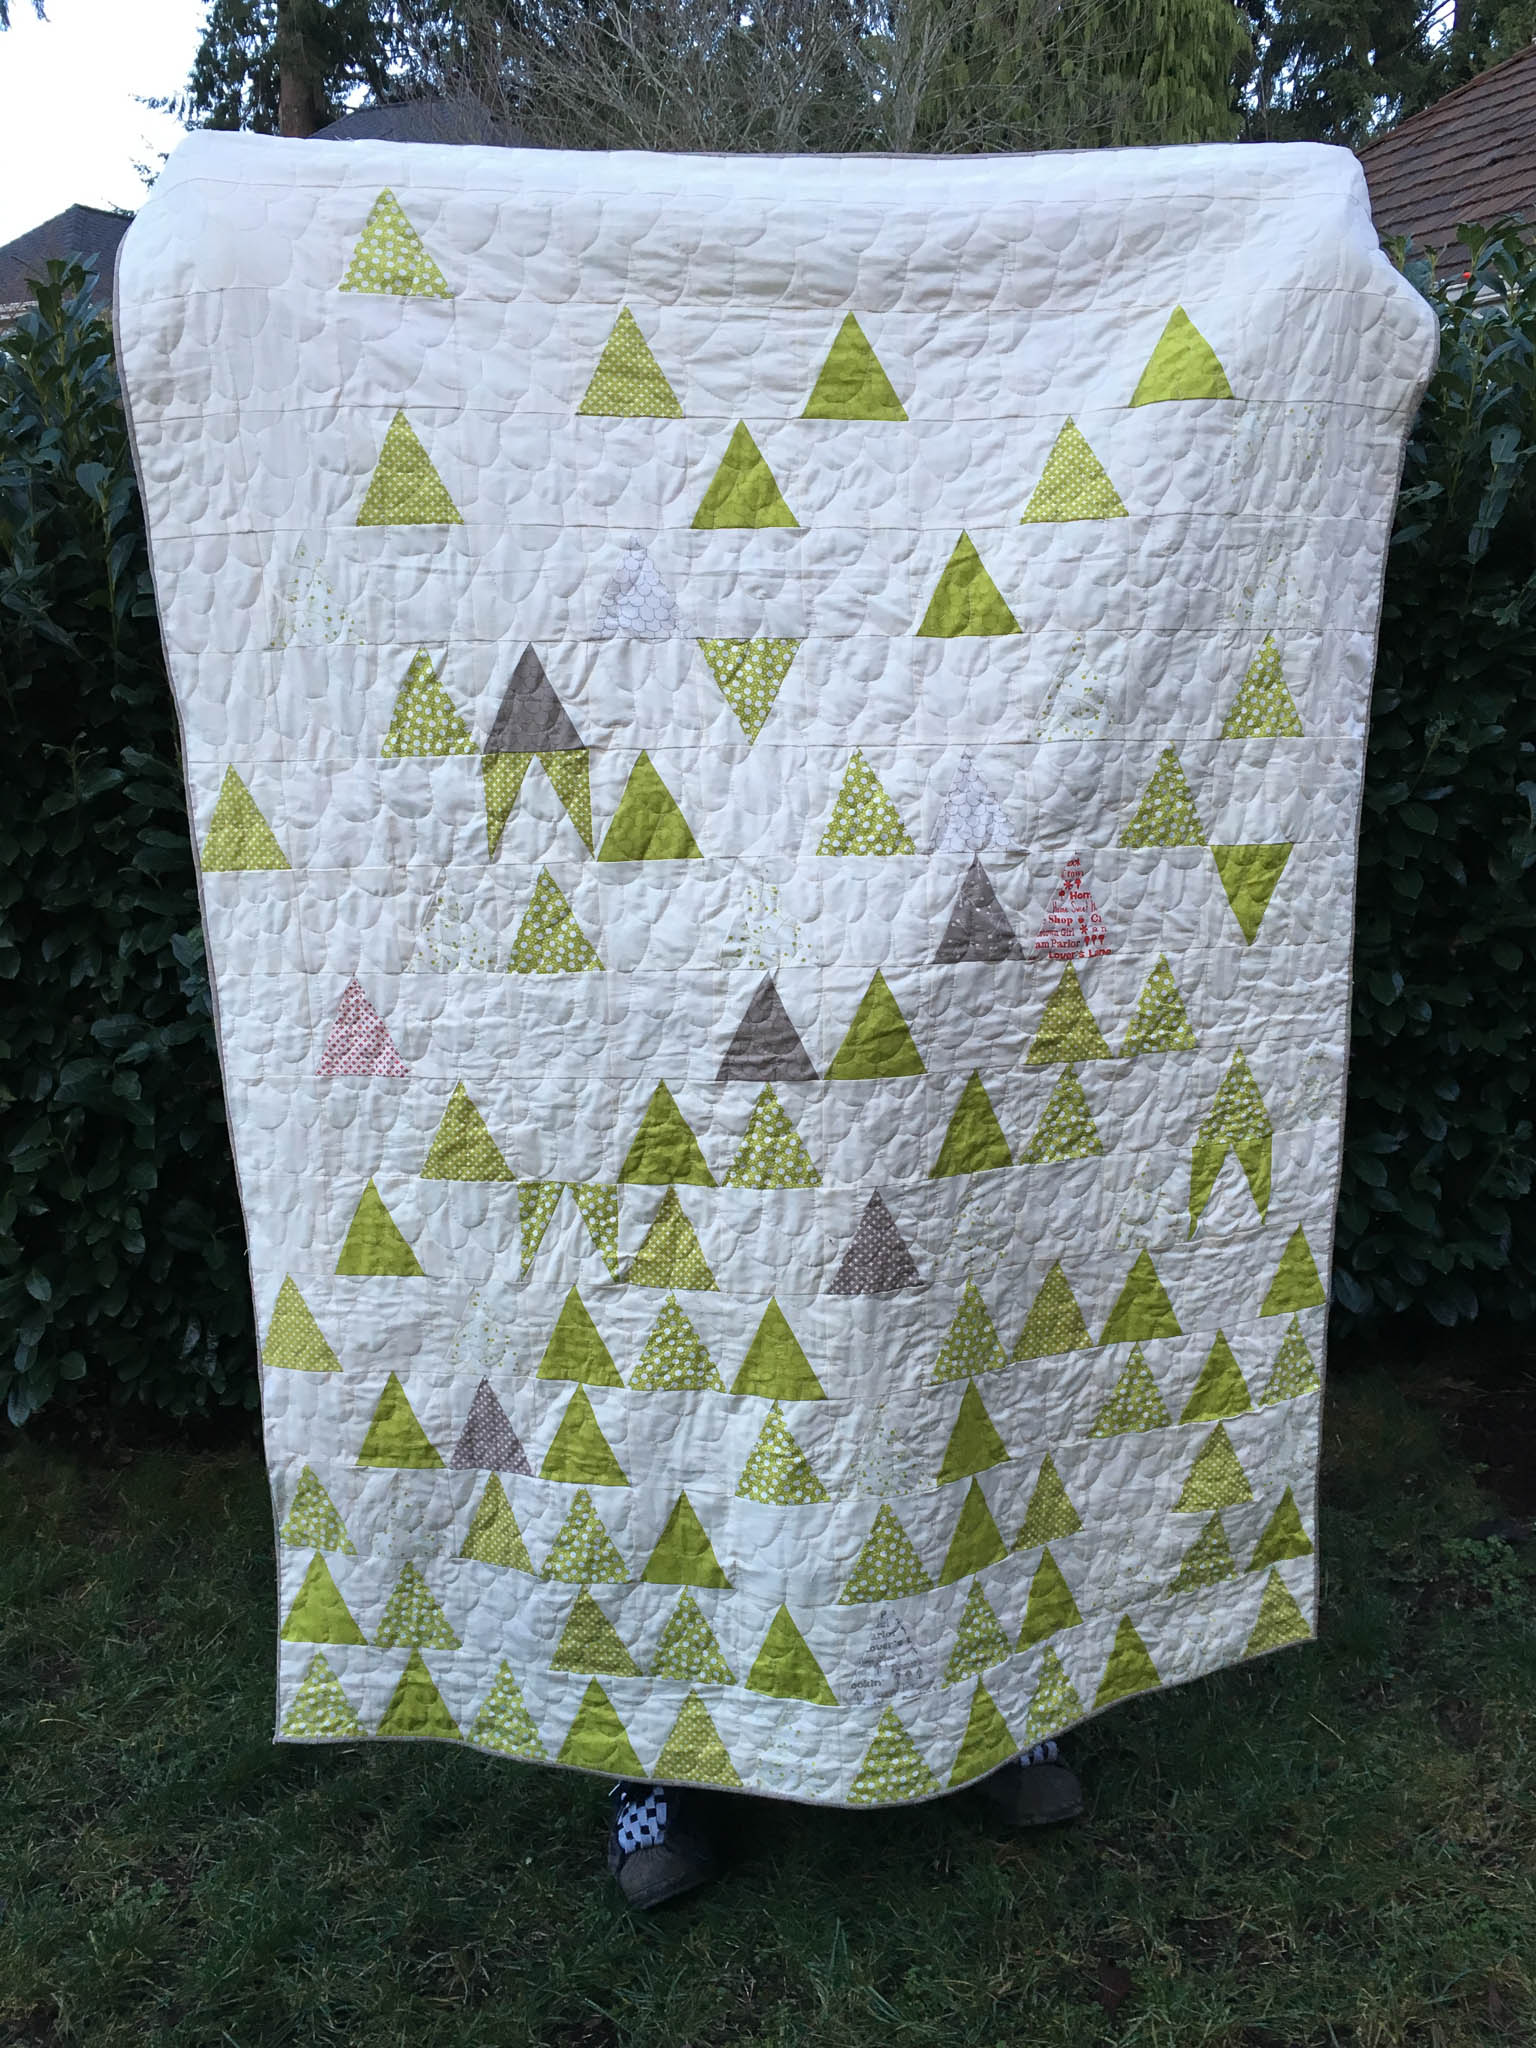
Winter Trees Quilt
Winter Trees Quilt
Published:
Dec 20 2015 - 23:00
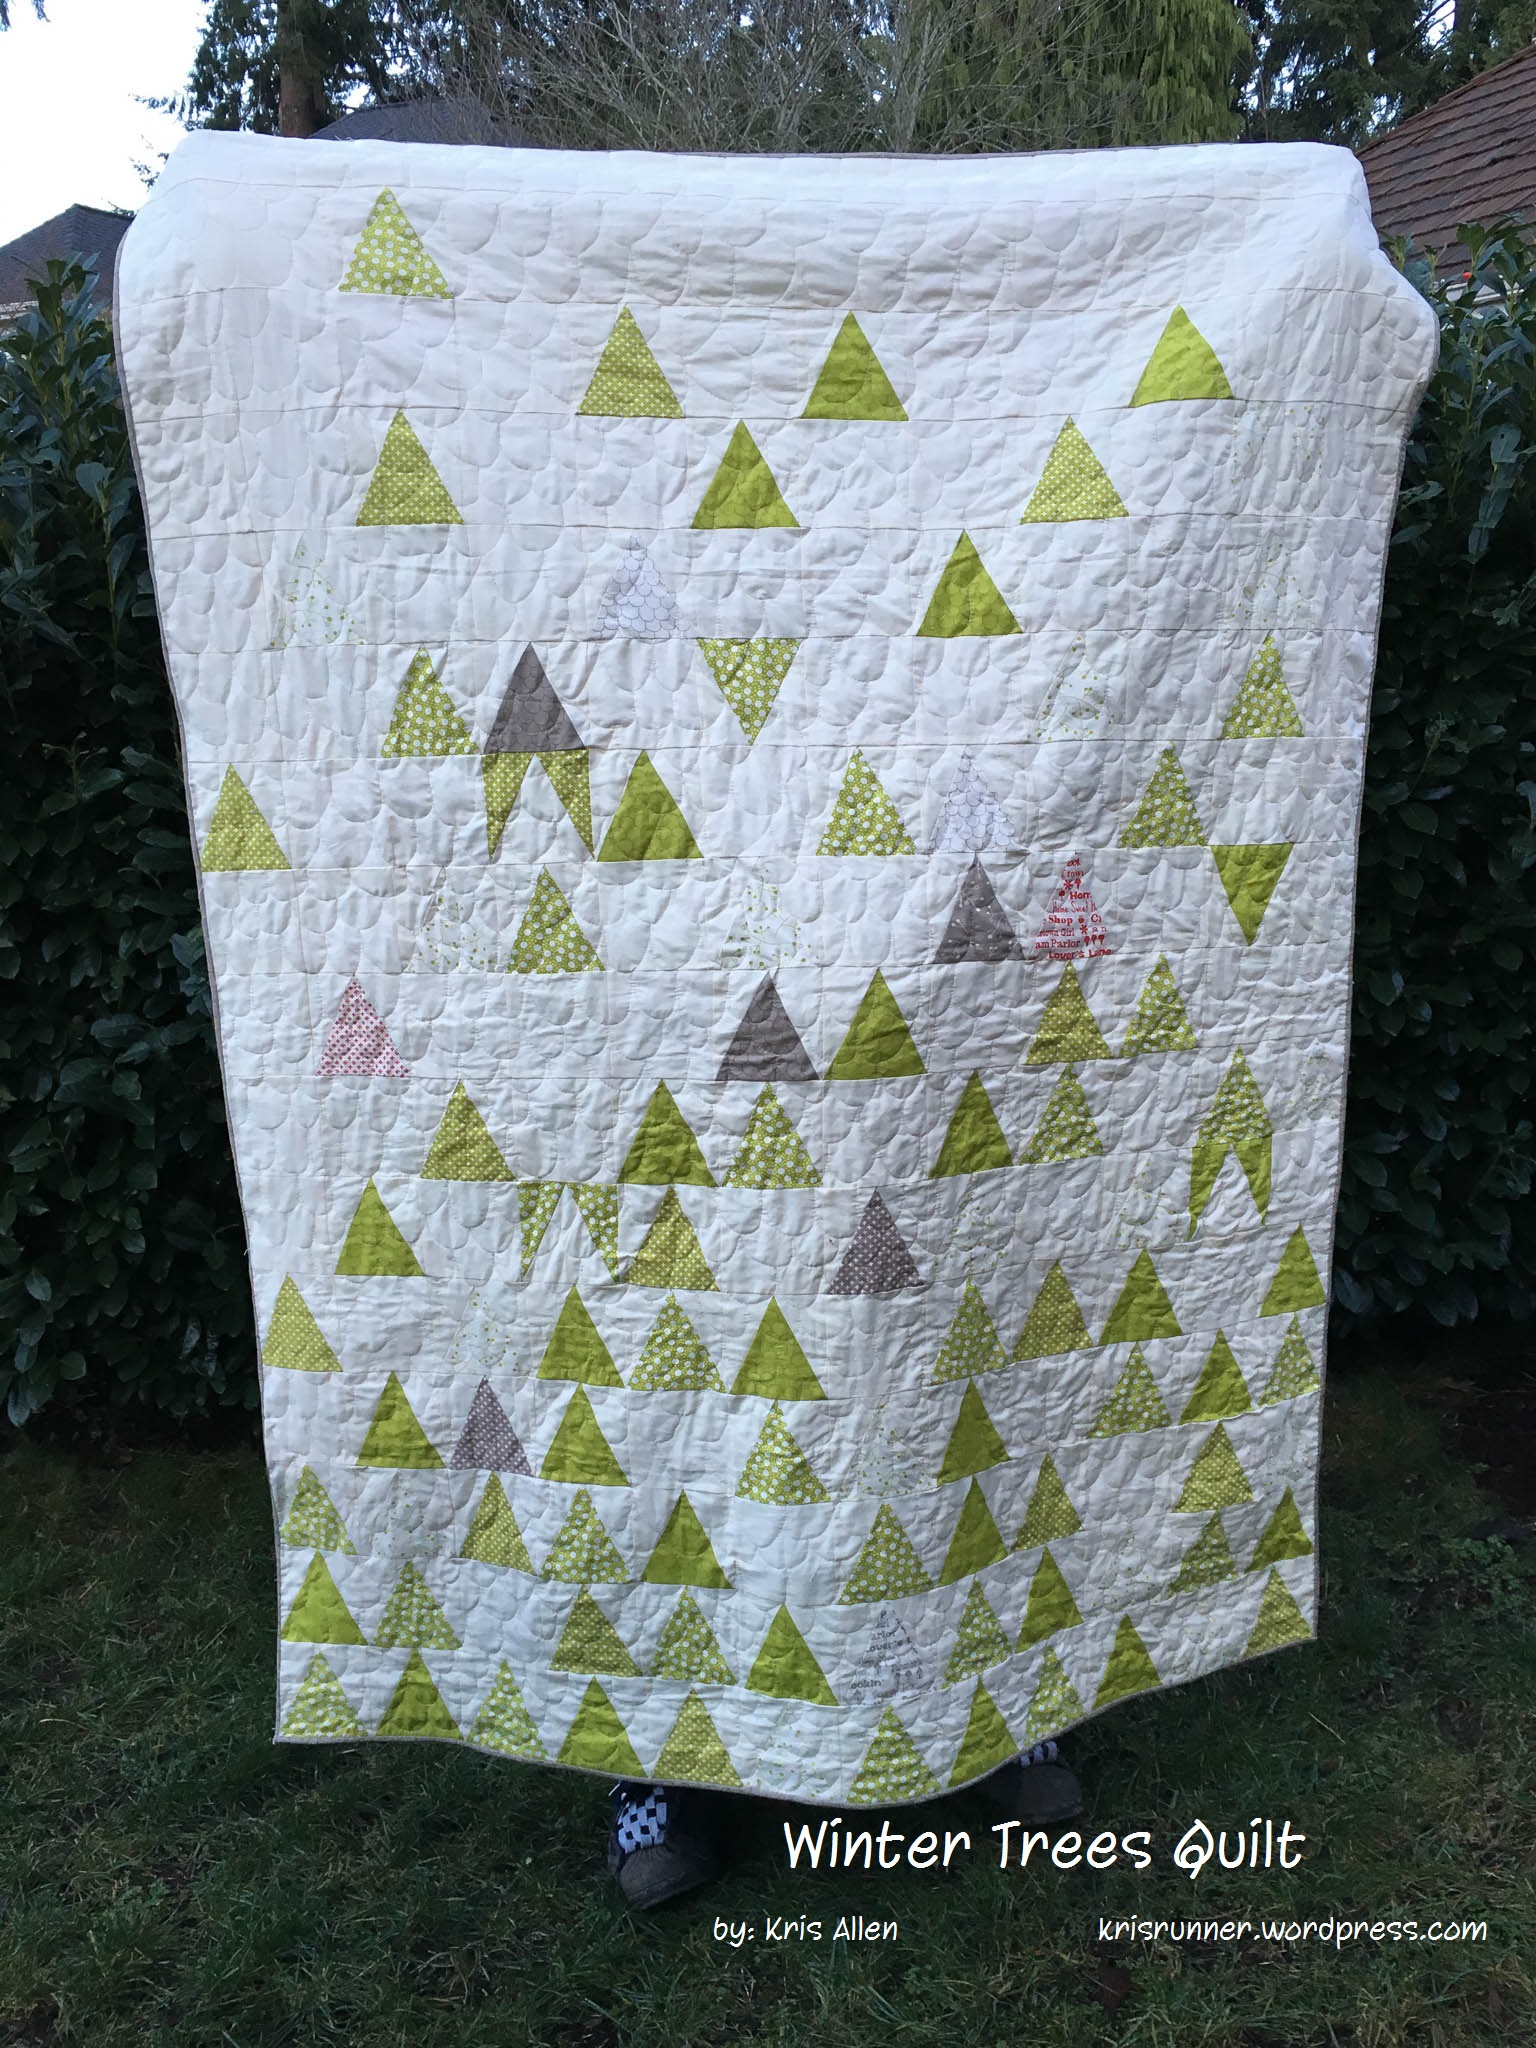

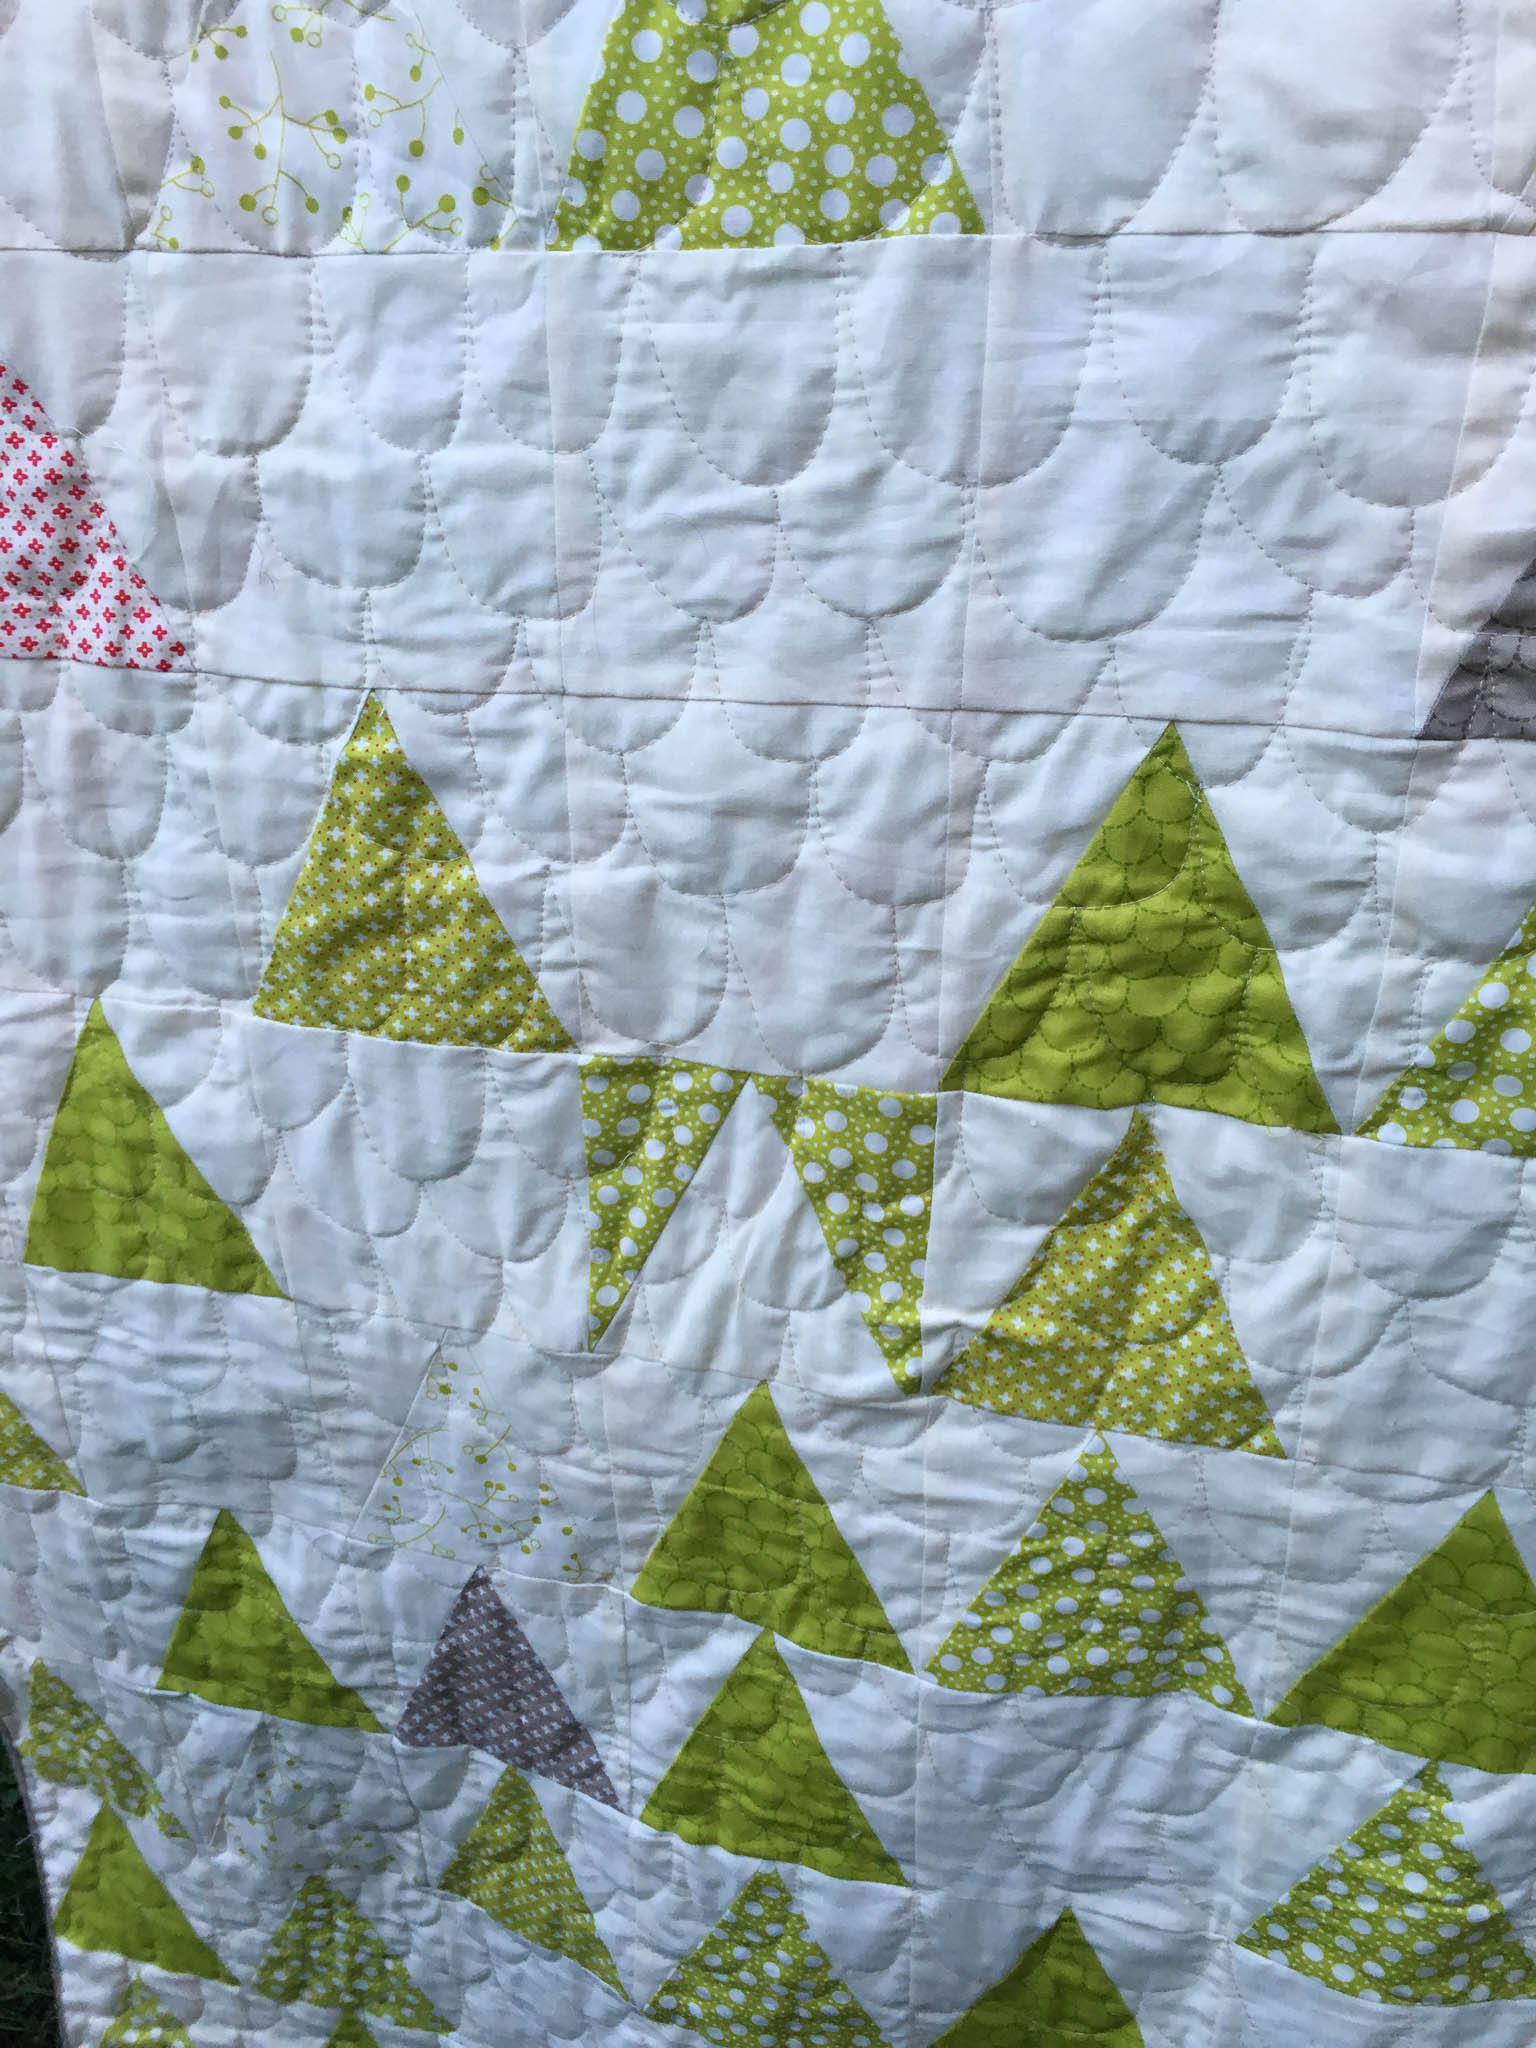
I love the winter time and this quilt reminds me of being in the mountain in the winter time with a fresh batch of snow. I love using negative space and also adding a bit of the unexpected (upside down triangles) to make the quilt fun. I used a couple of pop's of red to give a tad bit of Christmas feeling. Hope you have fun making this quilt and feel free to share your quilts with me on my blog.
This quilt/project finishes at 55" x 72".
![]()

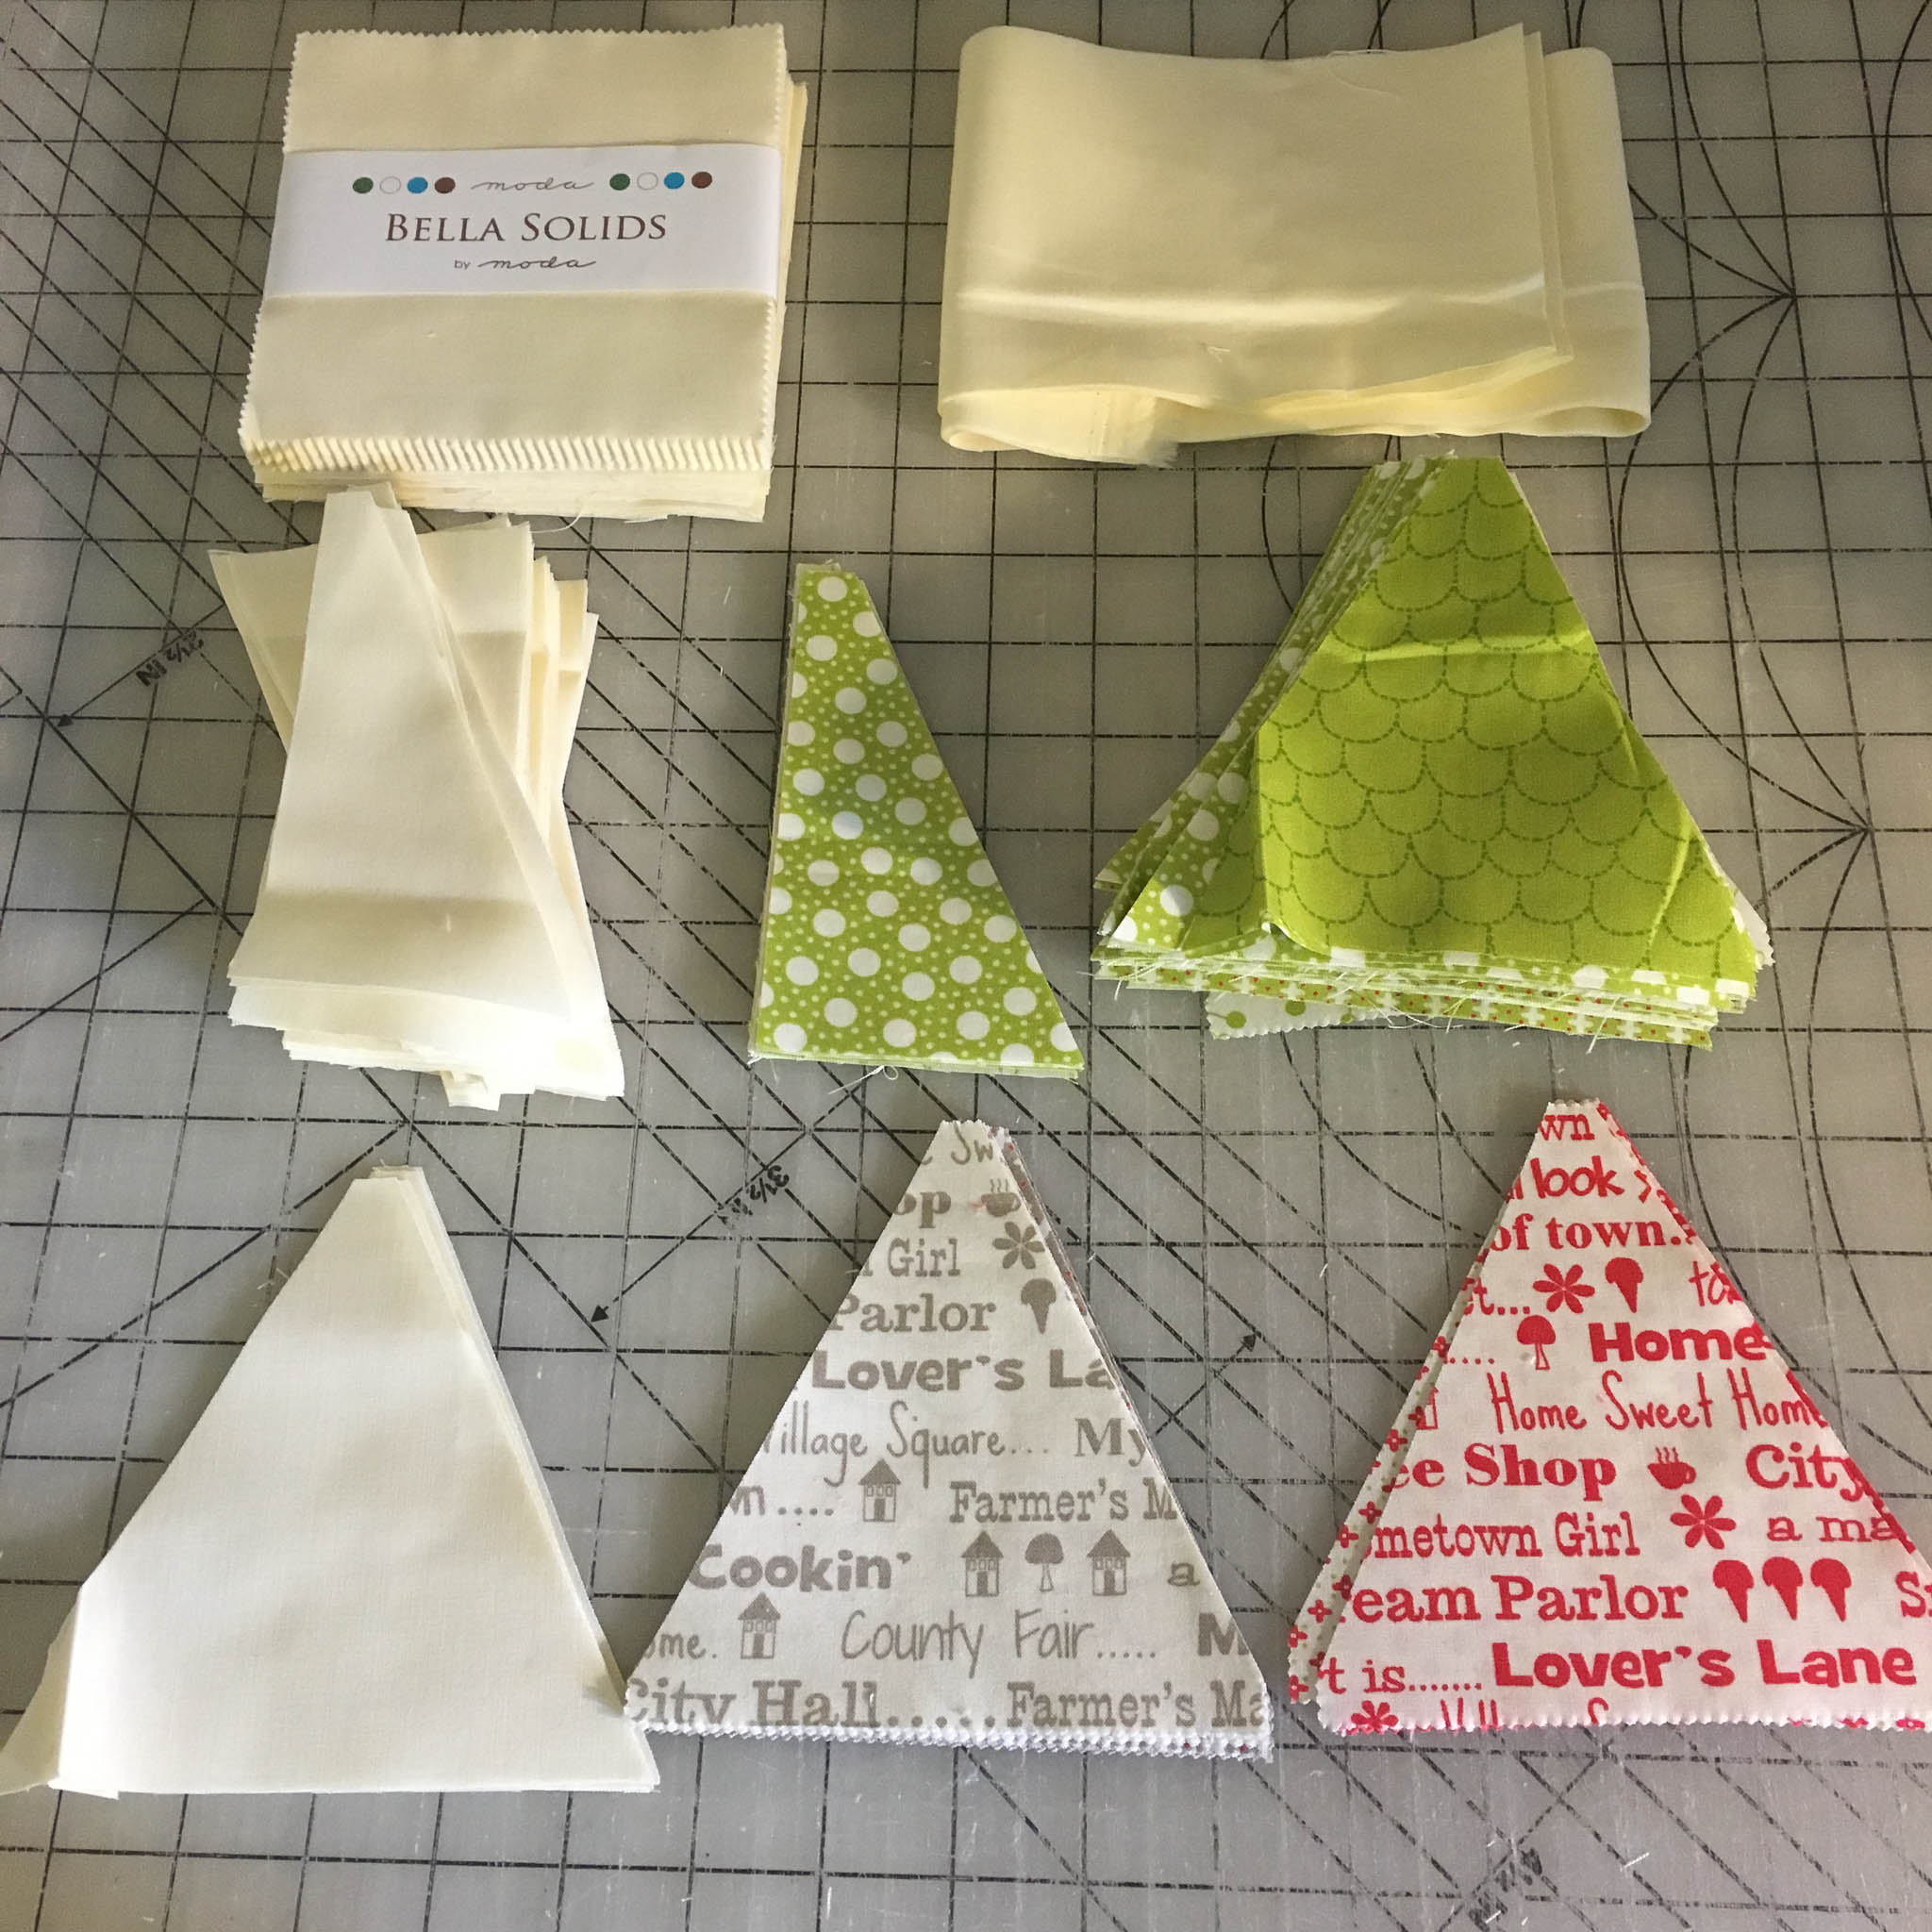
1 Charm Pack Hometown Girl by Pat Sloan
2 Charm Packs of Moda Bella Solids Snow
1/3 yard of the 4 Clover prints in the collection (Clover 43066 18; Clover 43063 21; Clover 43065 19; Cloud Cover 43062 13)
2 yard background fabric Belle Solids Snow
1/2 yard binding fabric Cobblestone 43062 13
4 yards backing fabric Cobblestone 43060 12
![]()
This is a very simple quilt to make. This quilts consists of 15 rows of 12 blocks. You will make one style block and then fill in the blanks with a solid charm pack squares.
There is no right or wrong layout with this quilt. I will show you what I did, but please feel free to change it to make it fit to your style.
Cutting Instructions:
Take your Hometown girl charm pack of and pull out the green's, 2 favorite red's and browns.
You will be cutting 5" triangles out of these colors. (Peaky and Spike Multi Sz Ruler8289 Michell Marketing#1 Manufacturer Item:8289)
Cut 6 - 5"xWOF of the green material. I choose to cut one from each color and then a second strip from the two darkest greens. I liked in my design to have more dark colors at the bottom and get lighter (not a complete ombre effect but the overall effect is darker at the bottom and lighter at the top). The cloud clover has more cream than green in it so if you are looking at the quilt from far way, it will appear to be cream. (See the bottom row of mine).
Subcut: To create your 5" triangles out of your strips, you will want to use the half triangle ruler for your first cut and then cut the rest of the strip with your full triangle. Cut the material folded over to give you 2 triangles at a time. Not critical for the full triangles, but really important for the half triangles. Make sure your cut to the 5" size for both the half and the full triangle. For your charm packs you just need to cut a 5" triangle from each of the greens, browns and 2 reds.
You will end up with 86 color triangles (8 browns, 2 reds and 80 greens)
You will also end up with 4 sets of half trangles from your 4 greens.
Cut 11 - 5" x WOF of the Bella Solid Snow
Subcut: Cut half triangles from your strips until you have 86 sets of half triangles (pairs - cut with material folded so that you have a right and left side - 172 total).
Subcut: Cut 4 - 5" triangles from the Bella Solid Snow.
You should have two 5"xWOF strips left. Those will be sewn together later as your top row. Hold onto these for the end.
How to make a 5" Triangle Block.
You will take one Triangle and a pair of half triangles. Line up one of the half triangle so that the short end is at the bottom of a triangle and the fat end is up at the top. See picture below as your guide.
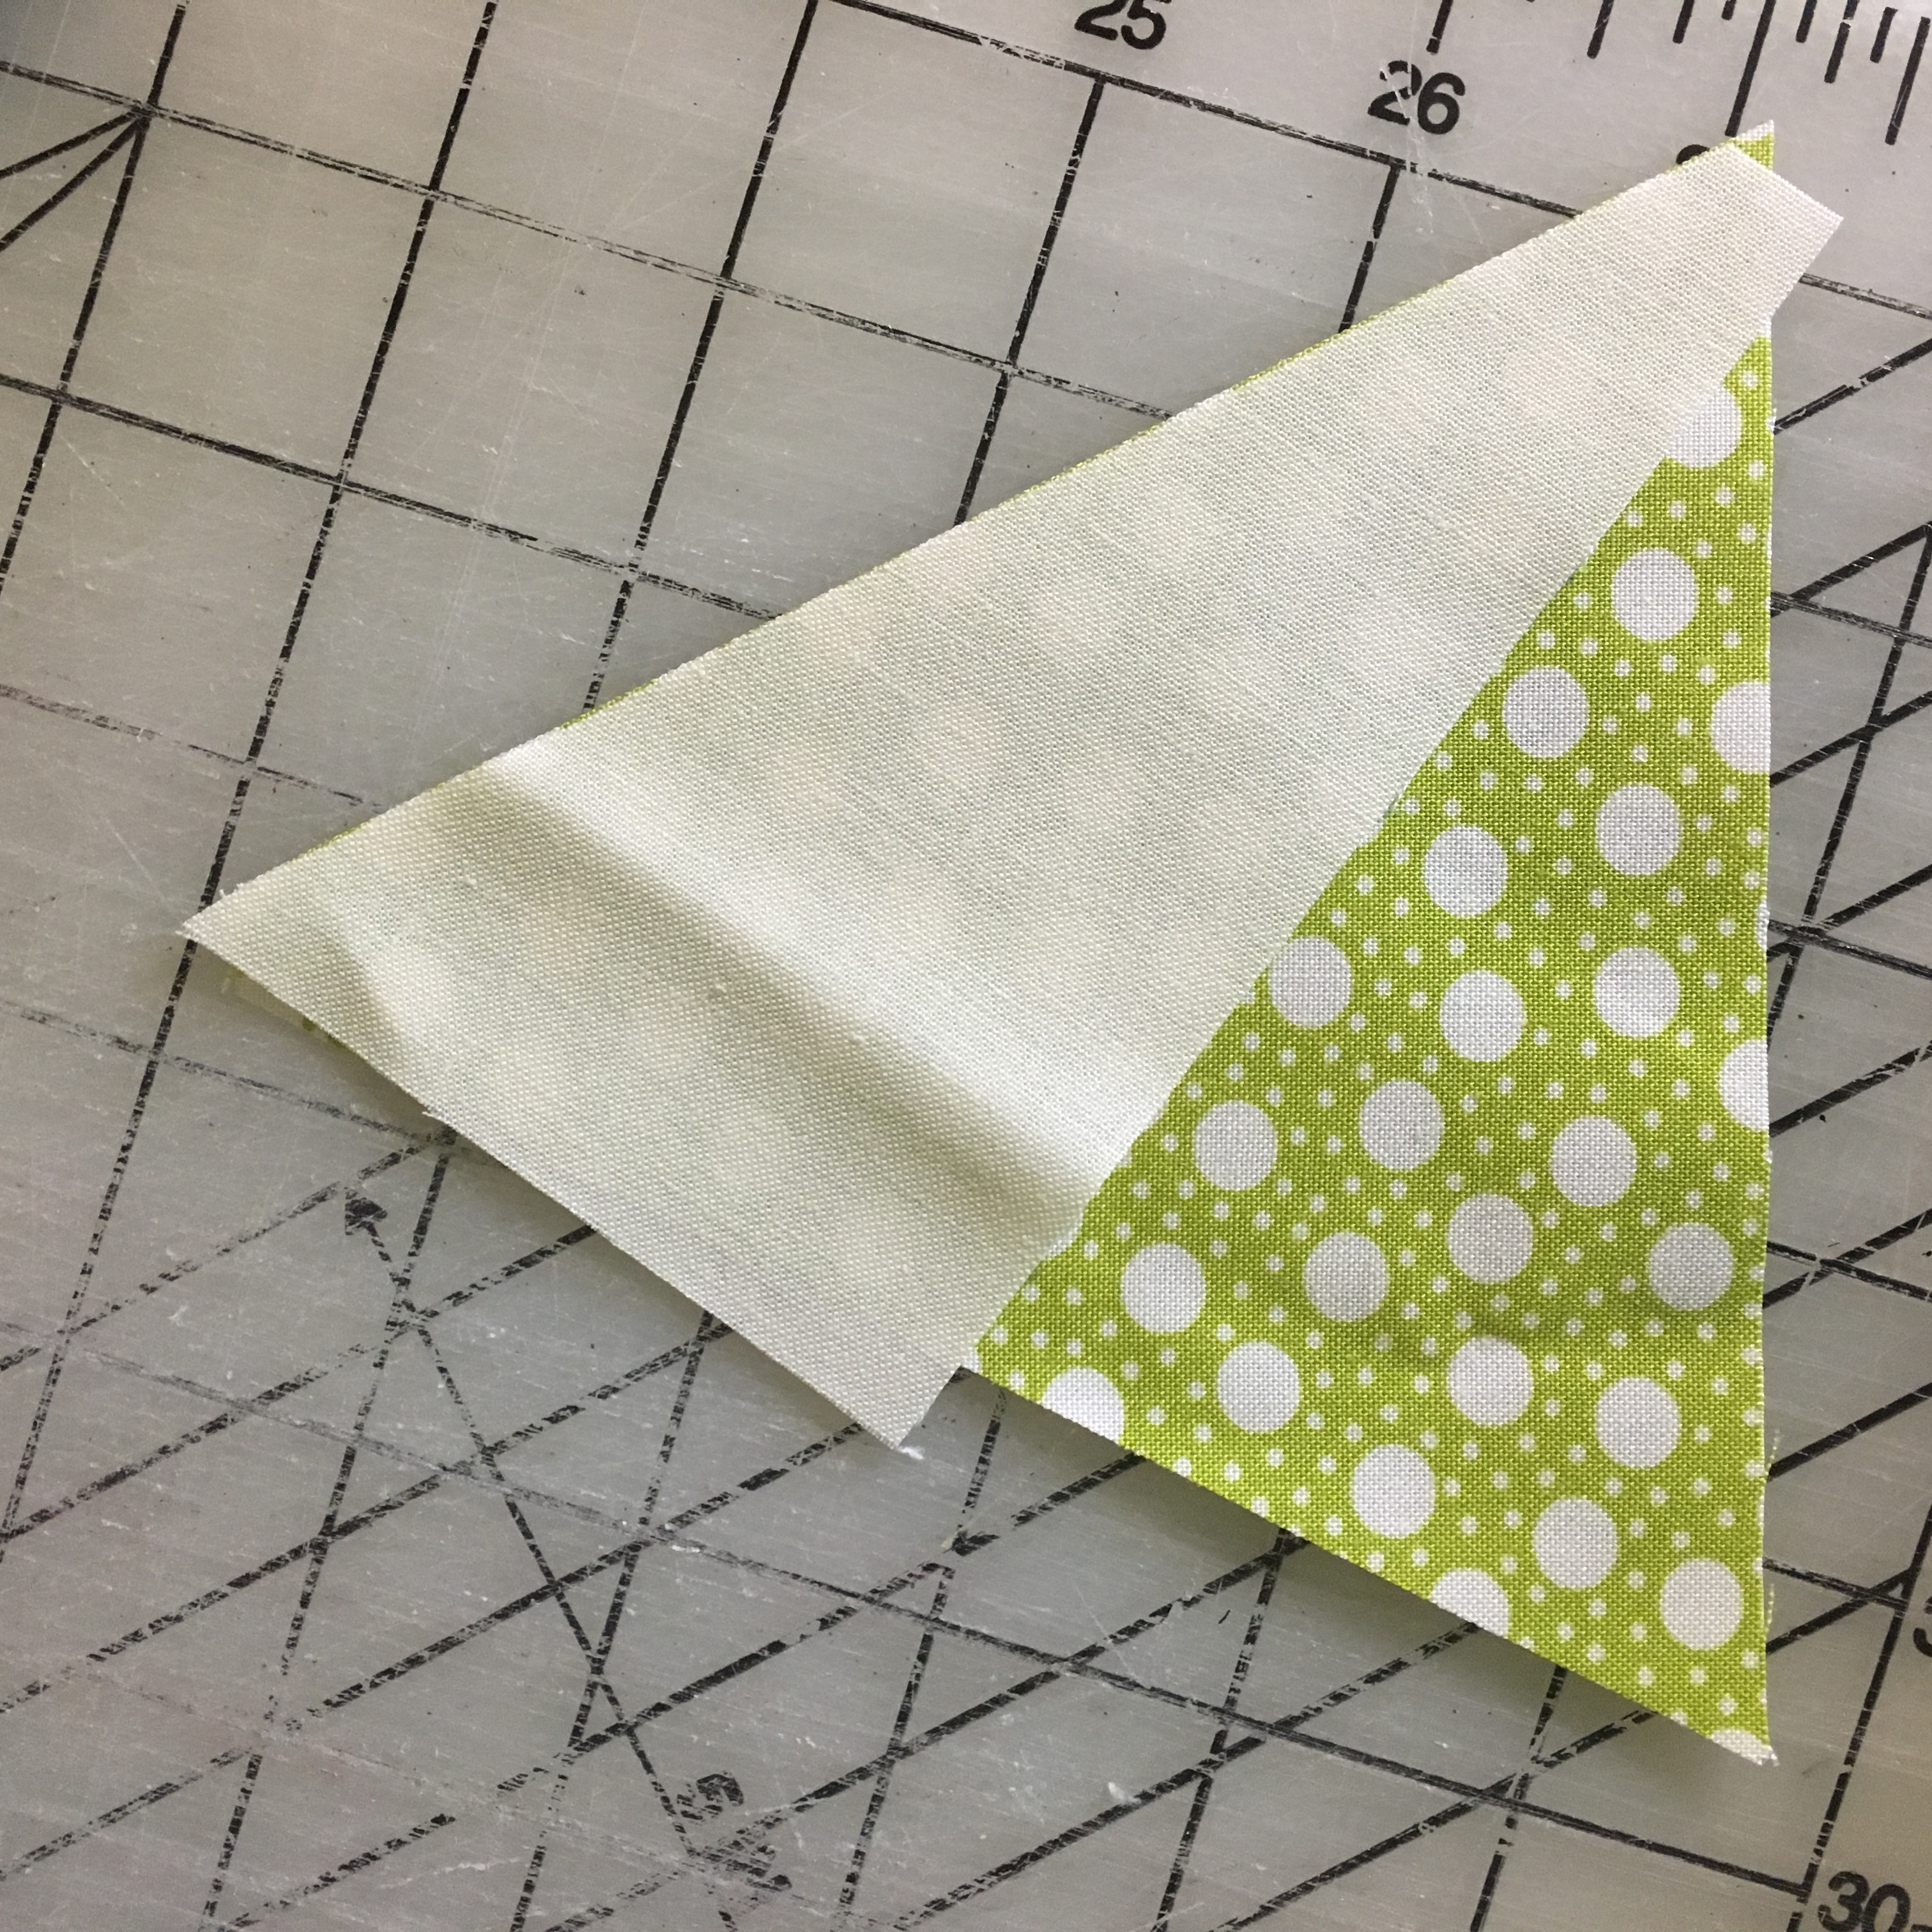
Sew with a 1/4" seam and then press open.
Take your triangle and now put the other pair of the half triangle on the other side of the triangle. Short end at the bottom and longer end at the top.

Sew a 1/4" seam and then press open. You should now have a 5" square. Trim your square if needed.
Repeat until you have sewn all the colored squares (86) and then repeat with a white triangle and the green half triangles. (4).
Now comes the fun part - the design.
Winter Trees This link will give you a 8x11 pdf on the design.

Feel free to use my pattern above as a guide. Start with how I have done it and then move around to your hearts content. I love to take a couple of pictures of different designs and text them to my sisters and daughters for comments and suggestions.
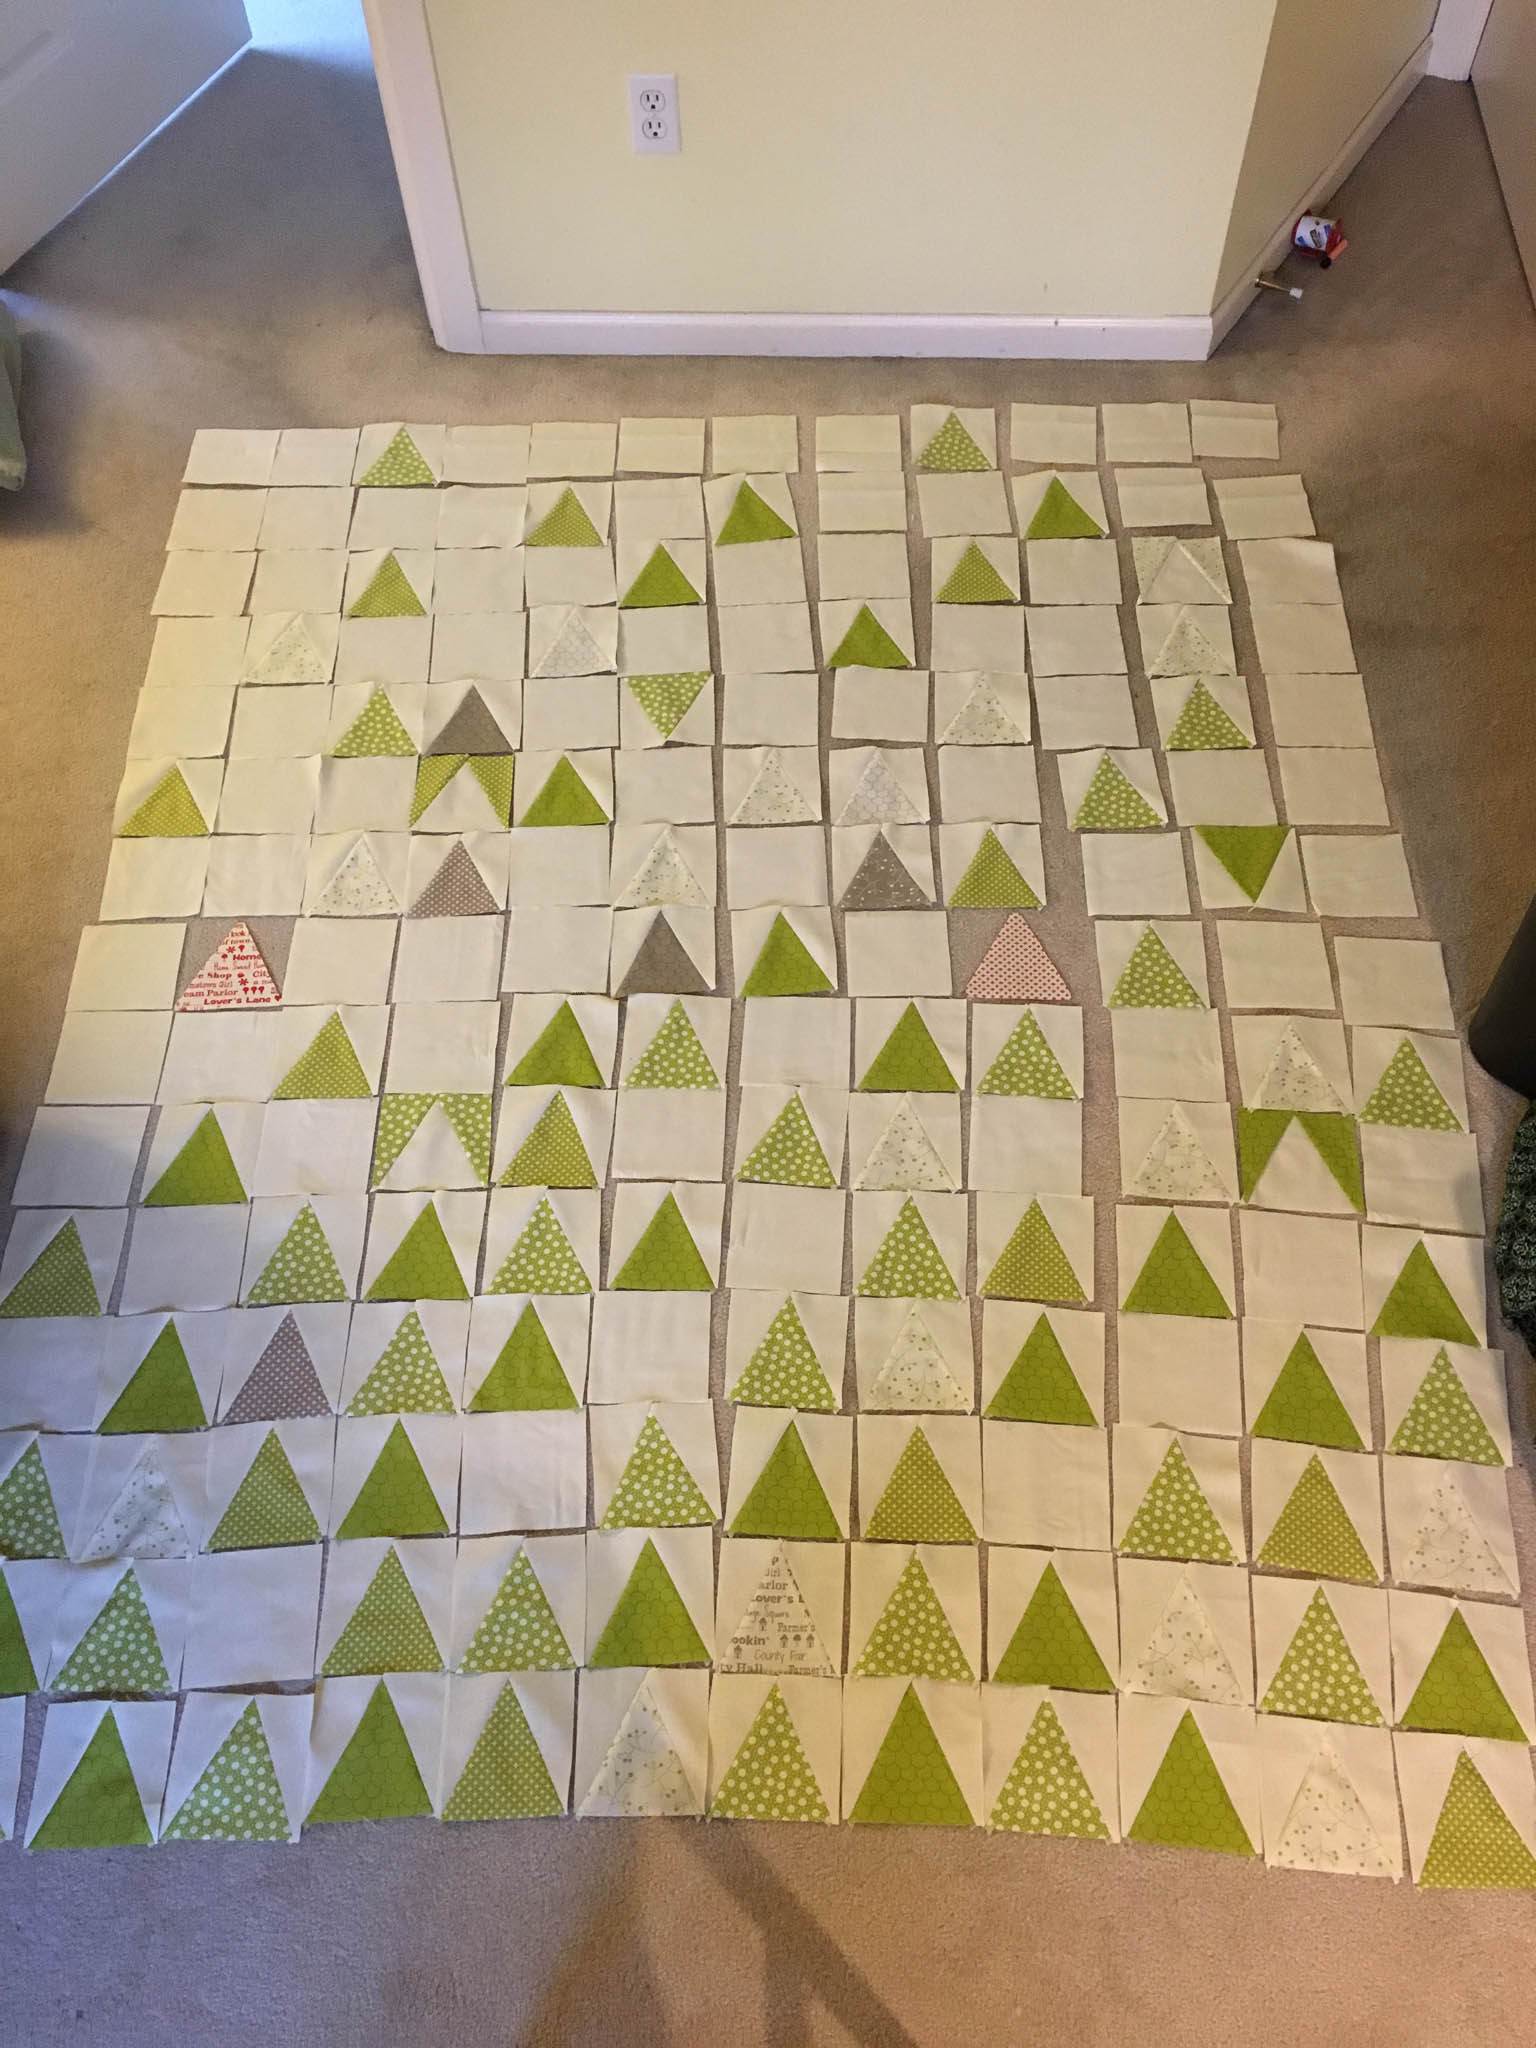
Place your color triangles and the bella solid squares to create a 15 block by 12 block layout. Know that you will still have a strip at the top of bella solid. I think it is important that the top row be blank. Below there design away to your hearts content.
One tip that I learned after I had sewn my quilt together that I hadn't noticed earlier. I do not care for as much the color on the outside with the white triangles right under a color triangle. It turns out looking too much like a space ship. I have adjusted in my design above so that this doesn't happen to you (unless you like it). Looked okay on my design and when my blocks weren't sewn together, but jumped out at me once I had sewn everything together. Not horrible, but if I was doing it again I would avoid it.
Once you have your blocks how you like them, you will begin to sew each row together using 1/4" seams.
Once all your rows are sewn together, then you will sew the rows together using 1/4" seams.
Once your 15 rows are sewn together, sew together your two remaining Bella Solid Snow 5" x WOF together. Measure to your rows (should be 72" wide and trim to the width of you quilt). Sew this strip onto the top of your quilt giving you 16 rows total.
Take a picture and send it to your friends. You have done great.
All you have left is to quilt it (I choose to use one of the patterns from the clover material which reminded me of garlands hanging on a tree) and then bind it.

Hope you enjoy and have lots of fun with this quilt. I sure did.
![]()
This quilt finishes at 55" x 72".
Kris Allen
Krisrunner
![]()
Posted in: