Welcome to Moda Fabrics!
Welcome Little One Quilt
Welcome Little One Quilt
Published:
May 22 2017 - 23:00

This is a fun quilt to make for the new arrival. Simple 9-Patch and Snowball blocks make a great visual secondary design.

The pieced border adds color and allows use of many fabrics in the bundle. In fact, multiple quilts can be made from one fat 8th bundle (with additional yardage), so make an extra like I did for those just in case moments!
This quilt/project finishes at 42½" x 48½"
![]()

1 Fat Eighth Bundle of Corner of 5th and Fun by Sandy Gervais
1½ Yards of Moda White for the Background, 1st and 3rd Borders
½ Yard of Binding Fabric
3 Yard Backing Fabric
![]()
Separate the fabric
Decide on 3- Fat 8th's for the snowball corners. I used gray, you may choose one color family or use a variety of colors.
Choose the remaining Fat 8th's you'd like for the 9-patch blocks. In my quilt I set aside the Fat 8th's with a cream background. I used those with the most color to provide contrast with the background fabric.

Fabric for 9-Patch Blocks
*If you have a Fat Quarter Bundle, they can be cut into 2 Fat 8th’s at 9” x 22”.
Press the Fabric
With a hot iron on a cotton setting press all of the fabric, removing the folds and creases. The background fabric is easiest to cut if it is folded in half lengthwise again, which results in about 11" width by the length of the fabric. Another tip when pressing pre-cut's, is to press the fabrics one on top of the other, lining up the selvage edge and left edges of the fabric. Then the fabric will be ready for multi-layer cutting.
*I like to use Best Press (or other starch alternative). I also use steam when pressing fabric. If you choose to use steam, be sure to lift the iron up and down in a pressing manner. Do not move the iron back and forth in all directions as you would iron a shirt, this will stretch the fabric.
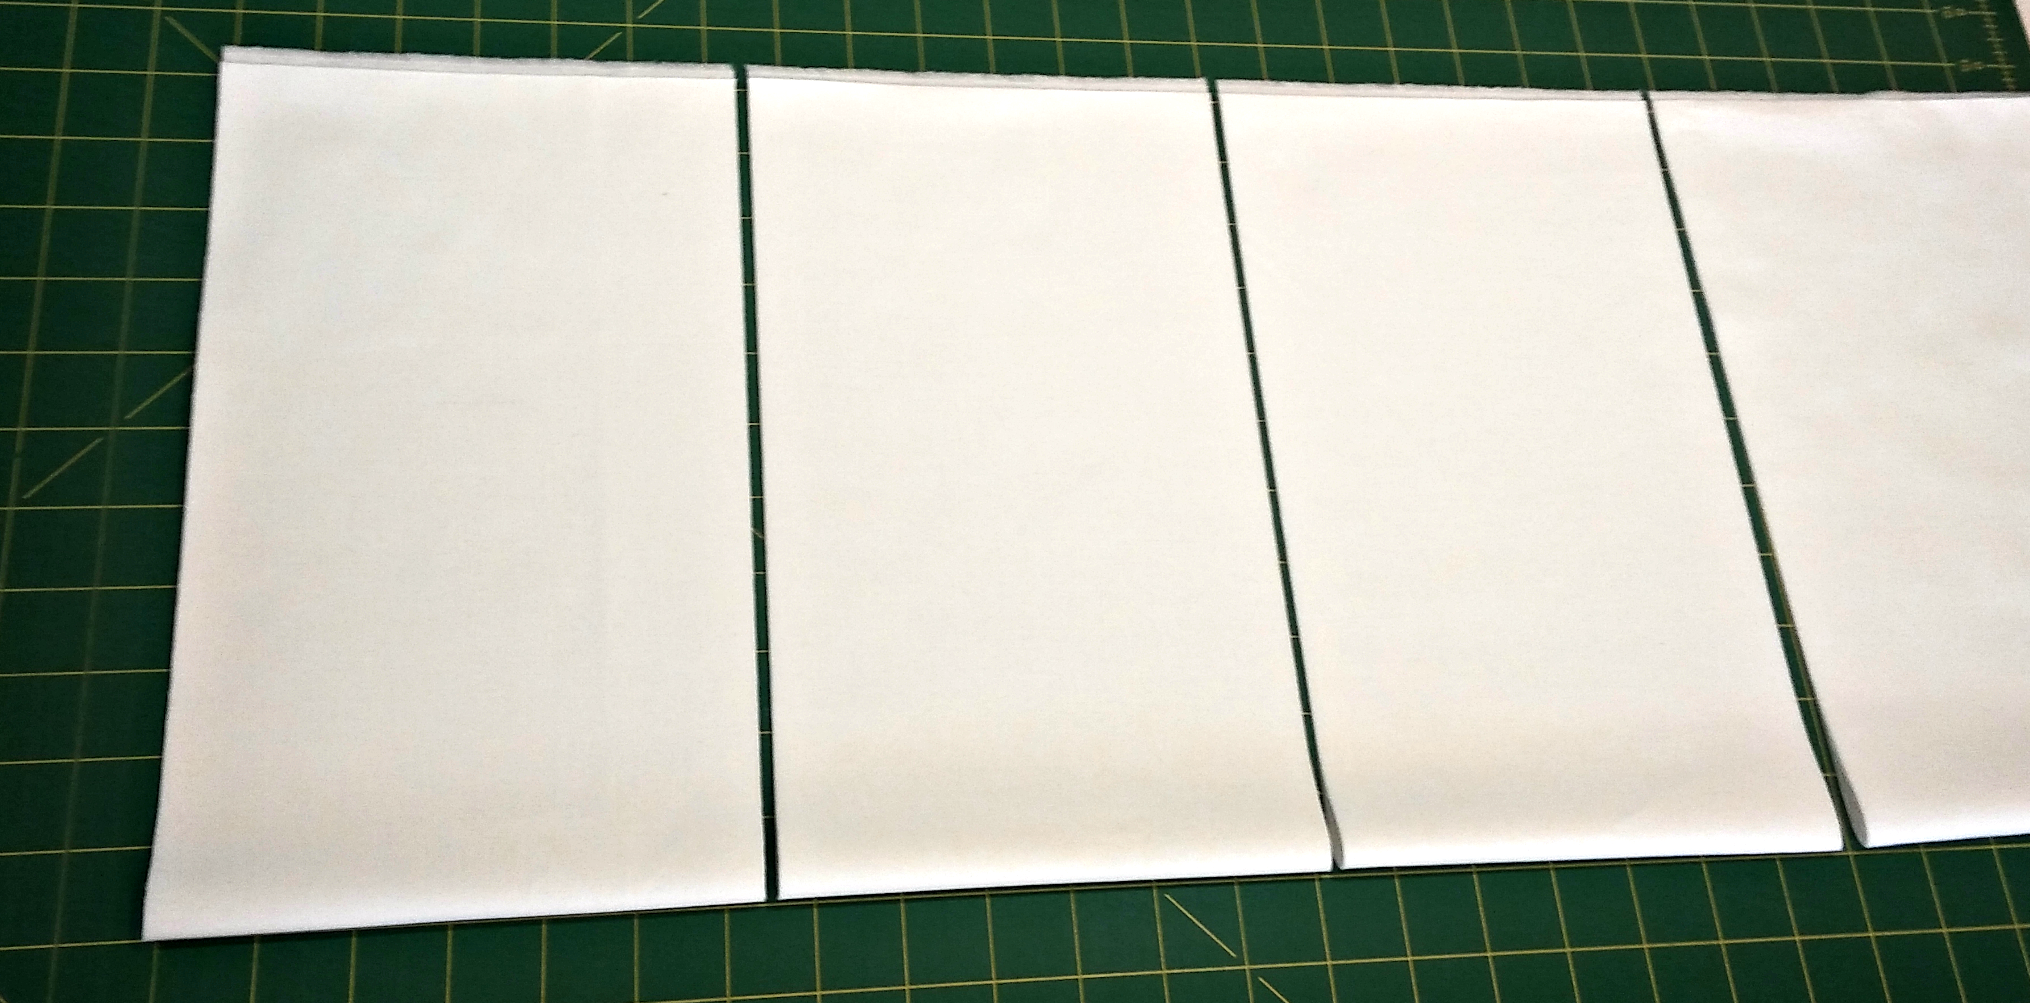
Cut the Fabric
From background fabric cut:
- 14- 2½" X 40" Strips
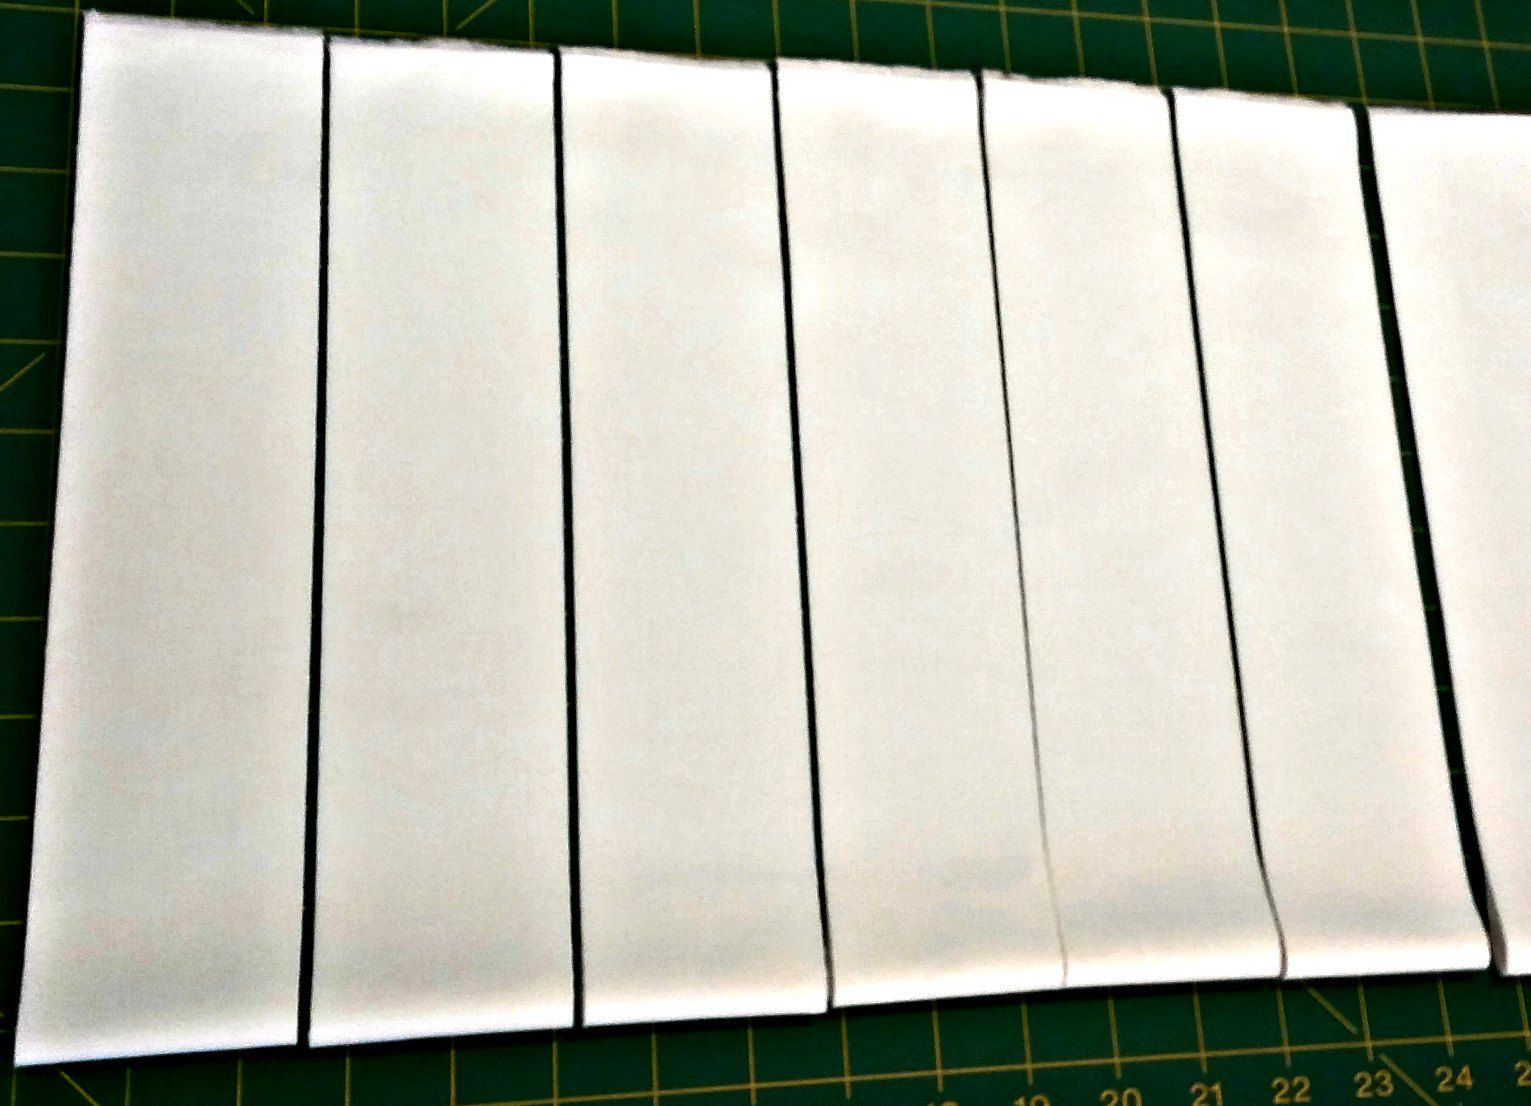
- 3- 6½" X 40" Strips, Sub-cut into 15- 6½" X 6½"

Snowball Block Corner Triangle Cut (60):
(set aside the extra 12- 2½" X 2½" for the pieced border)

Sliver Trim Edge and Bottom
Cut 3- 2½" x 21" Strips from each of 3 - Fat 8th
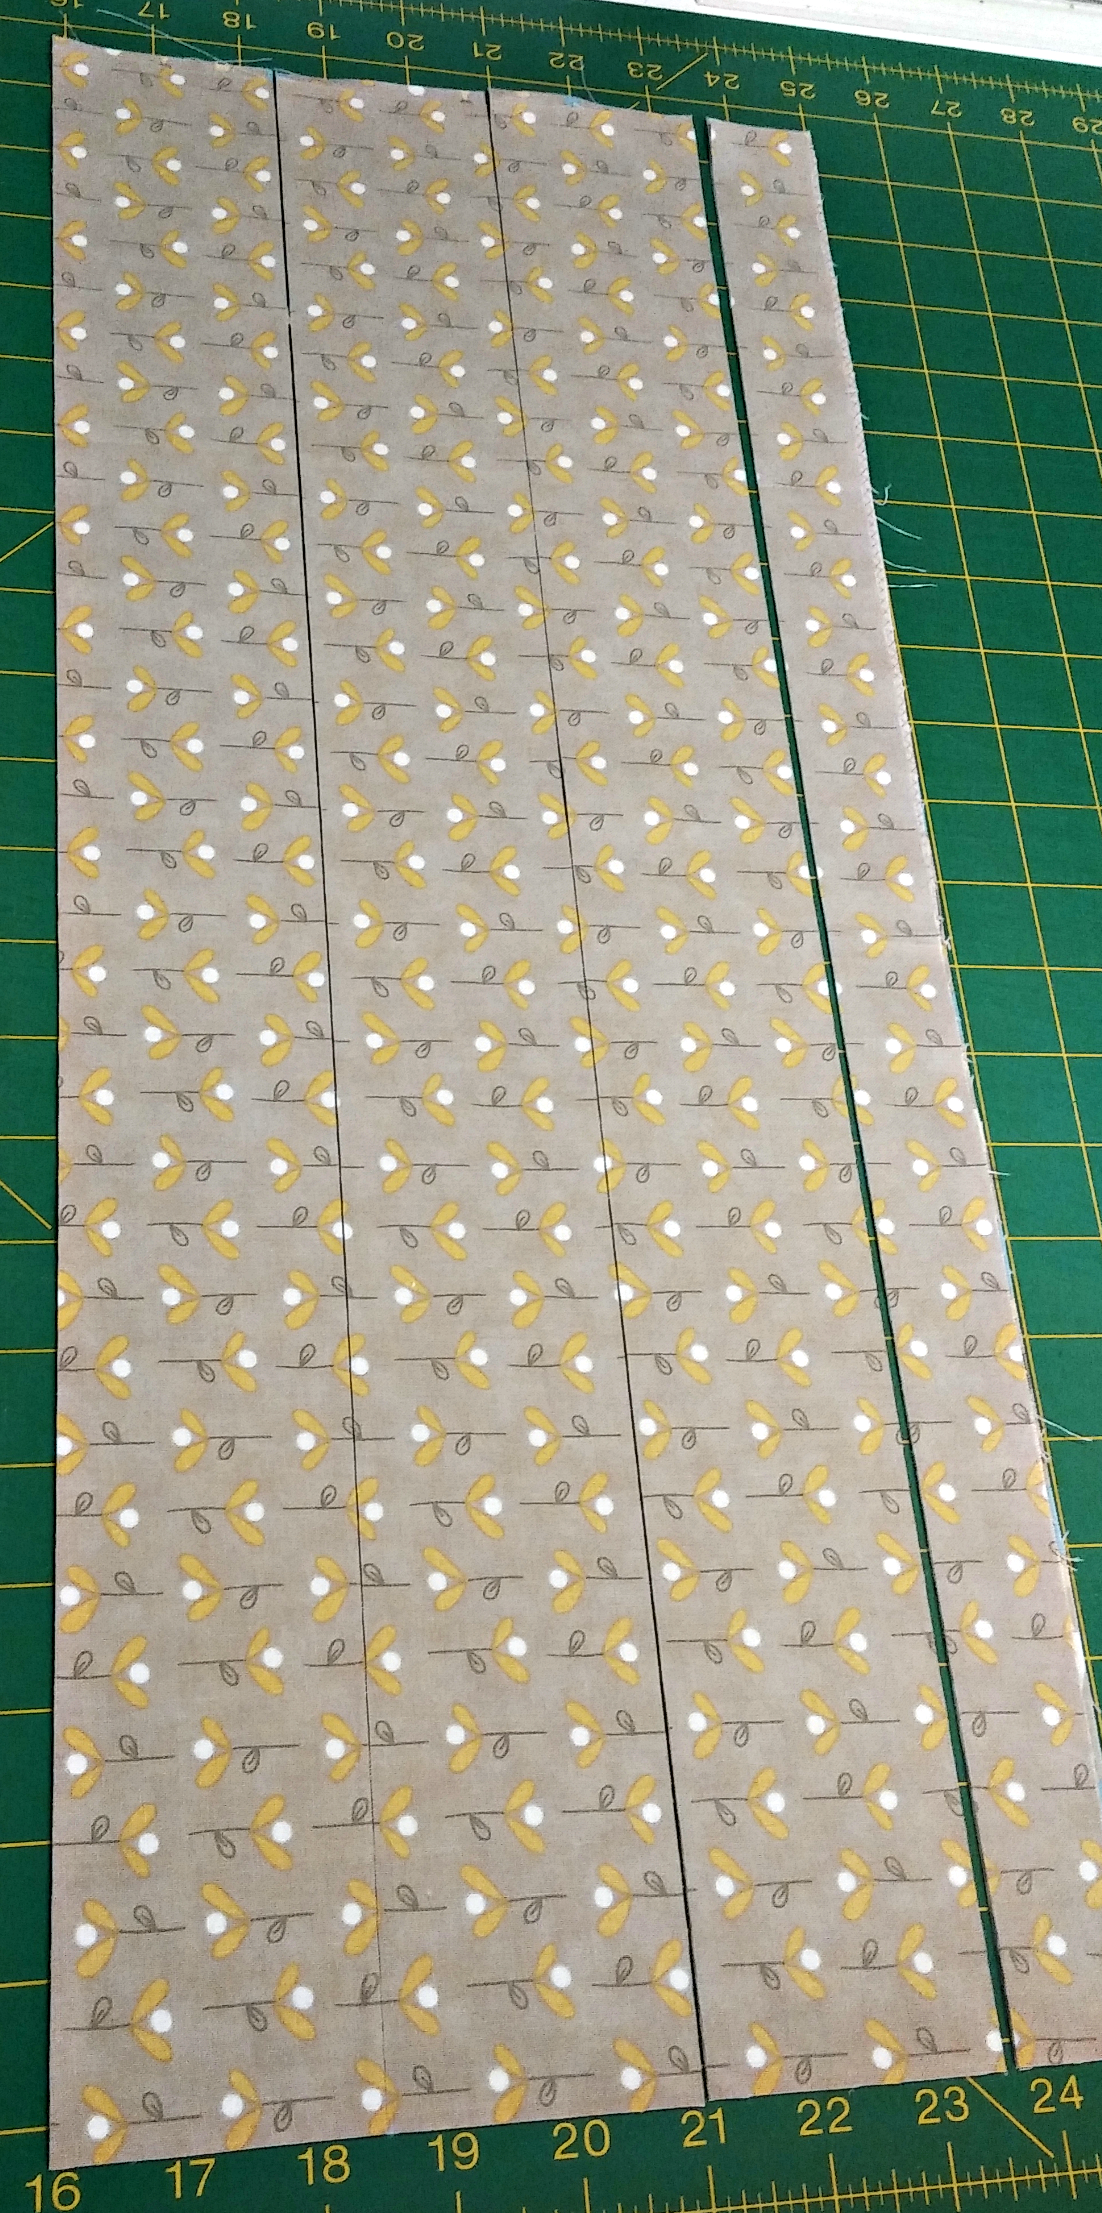
Cut 3- 2½" x 21" Strips
Sub-cut each strip into 8- 2½" x 2½"

Sub-cut to 8- 2½" x 2½" per strip
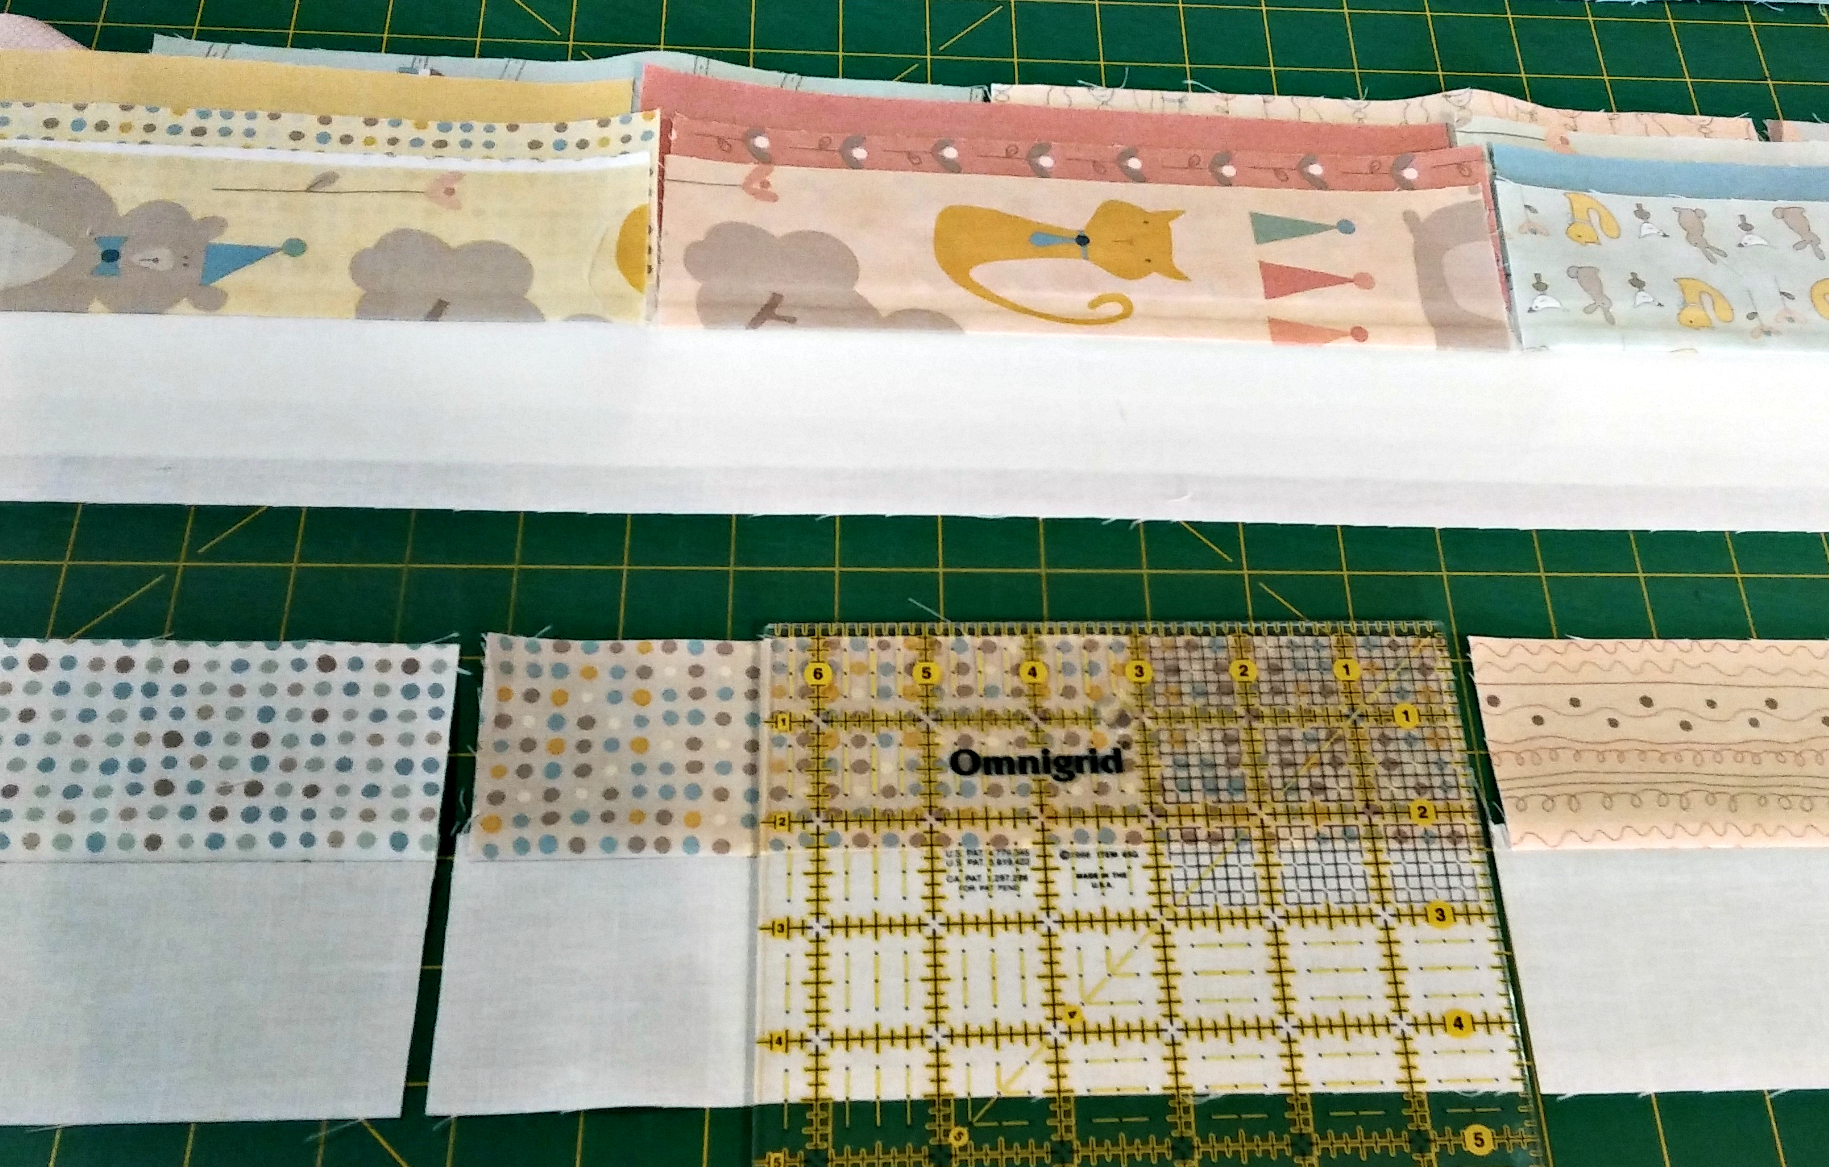
Cut the Fat 8th's for the 9-Patch Blocks & Scrap Border:
Cut 25- 2½" x 9" (9-patch blocks)
Cut 25- 2½" x 9" (scrap border)
sub-cut to 78- 2½" X 2½"
*To ease the cutting layer the Fat 8th's, 5-7 at a time, be sure to use a larger rotary cutter. I cut 2- 2½" X 9" strips from each Fat 8th, set one set aside for the 9-patch blocks, and sub-cut one set for the pieced border.

Layer Fabrics to Cut

Sub-cut one set into 75- 2 ½" x 2½"
Piecing the 9-Patch Block (15):
Using 2- 2½" x 40" Background Fabric and 20- 2½" x 9", Make 2 strip set Print-Background-Print. Stitch a 9" strip to the background, then nest the next 9" strip to the first strip and continue sewing. Add 5- 2½" x 9" strips to each of the 2-40" background strip - yes a little fabric will hang over and that is okay.

Press to the Print Fabric
Press & Cut Apart 9"
Sections
Take the remaining 2½" x 9" strips and stitch them to the background fabric on the previous units. Press the seam to the print fabric. Lay a strip set on the cutting mat, sliver trim one edge, cut 3- 2½" x 6½" units per 9" strip.
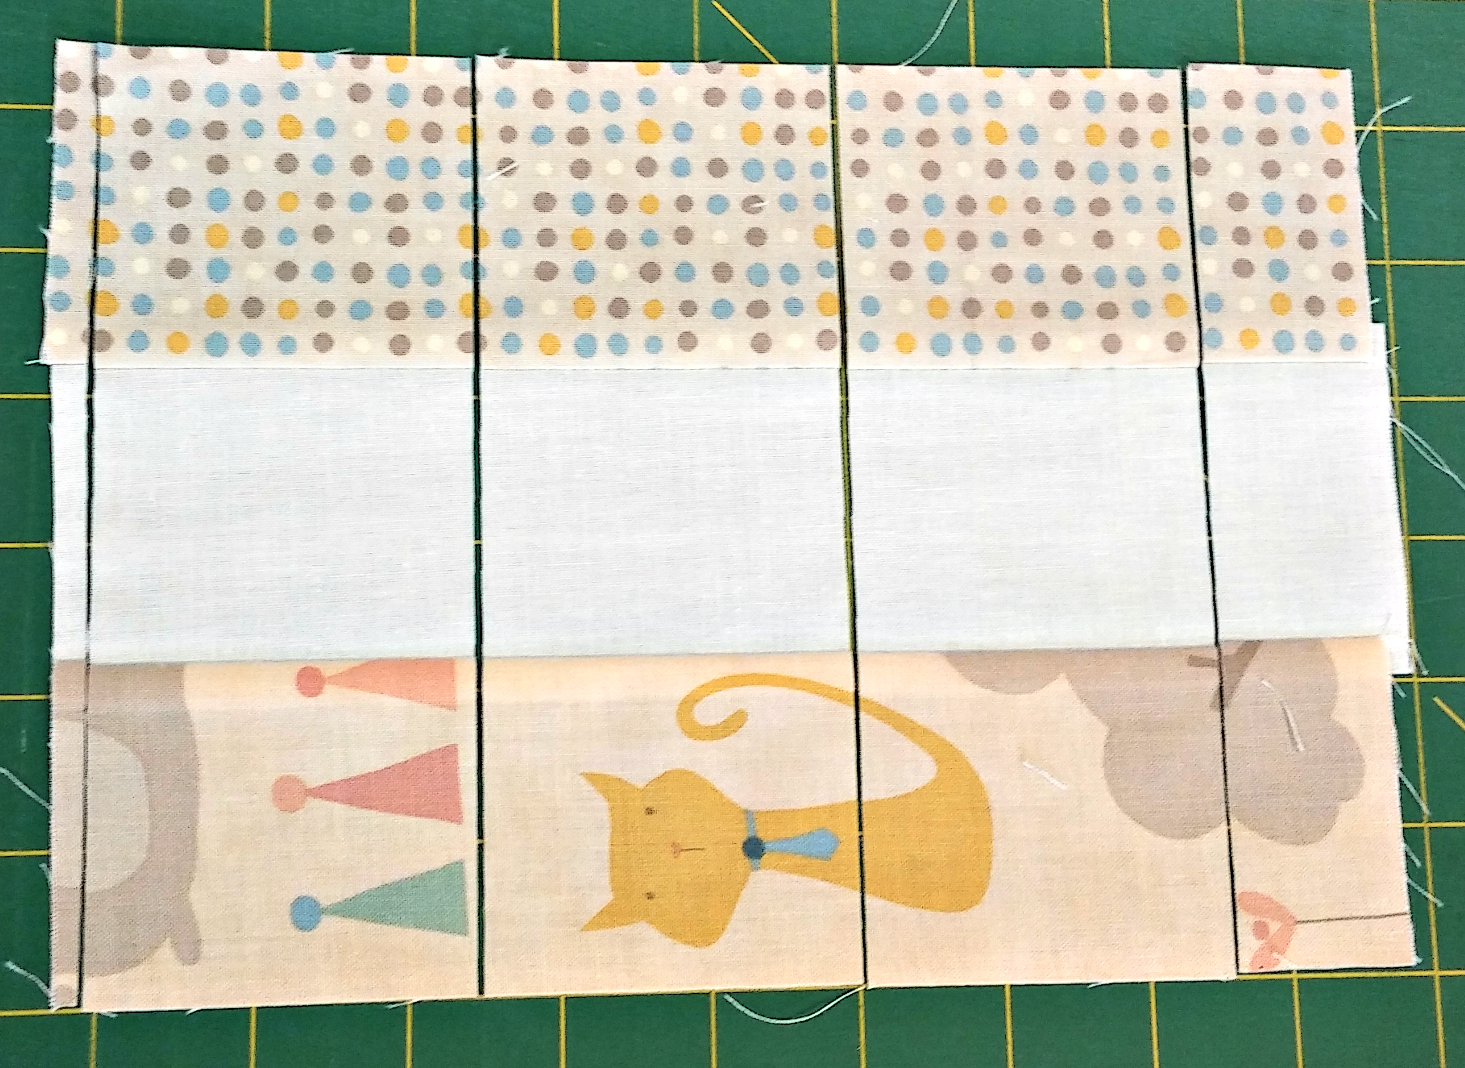
Make 30 of this unit
With the remaining 10- 2½" x 9" strips and the 2 - 2½" x 40" strip , make one strip set of Background-Print-Background. As above, press to the print fabric, cut apart the 9" sections, and cut each 9" section into 3 - 2½" x 6½".
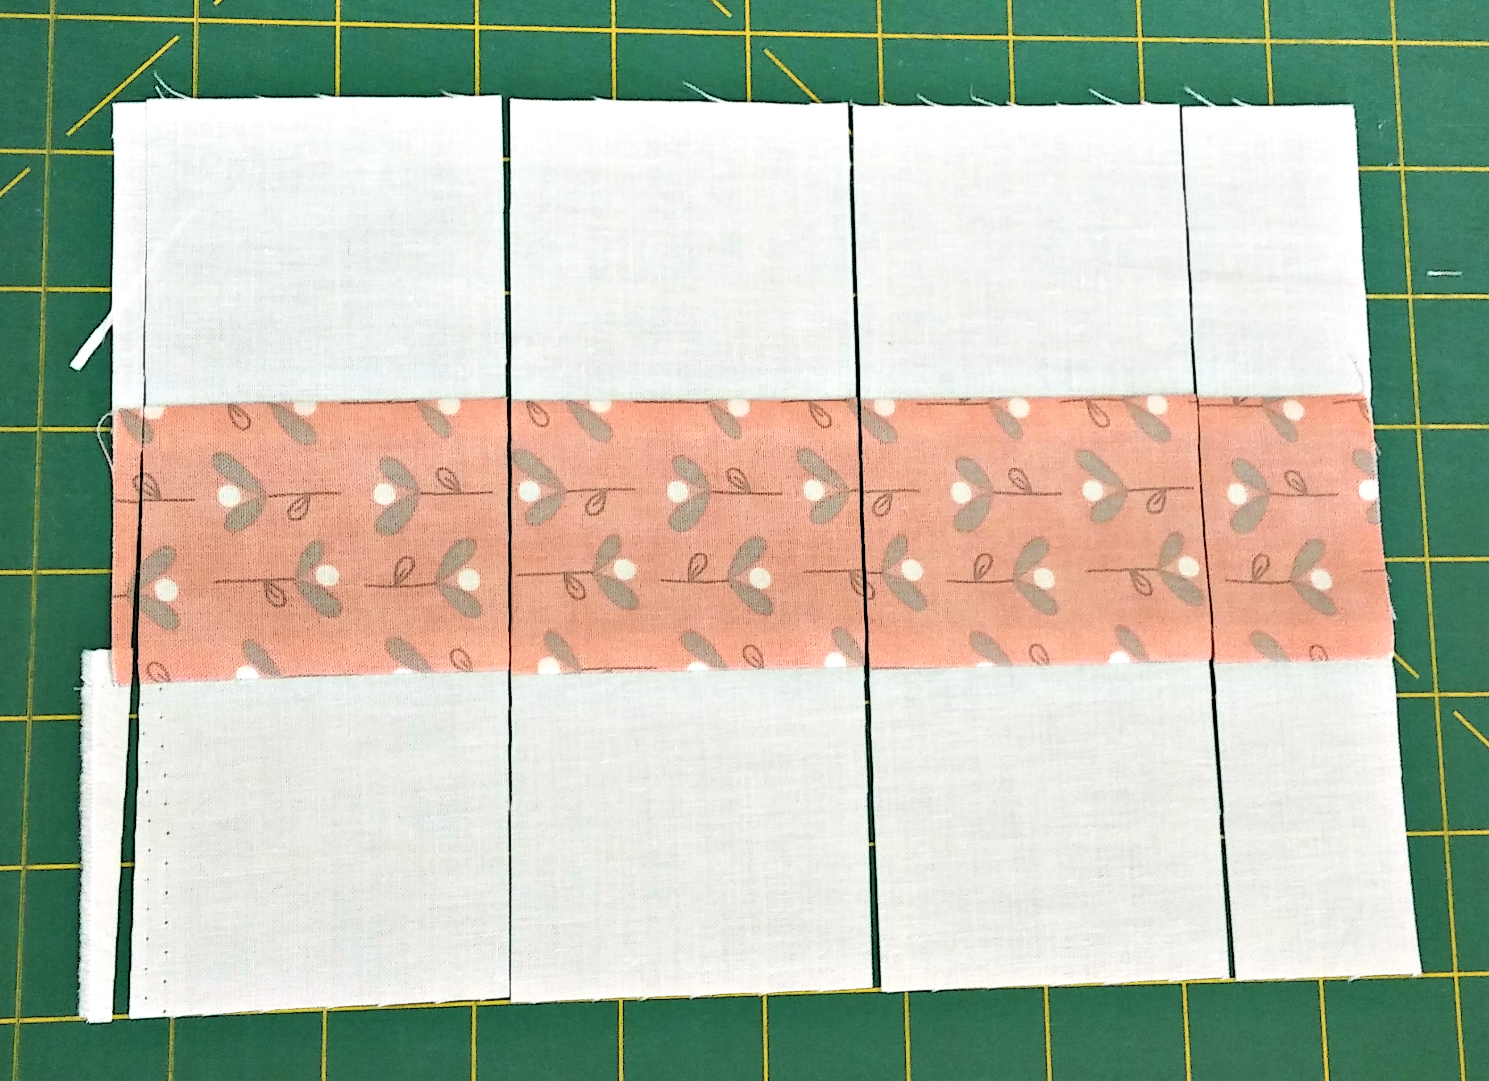
Make 15 of this unit
Complete the 9-Patch block (15):
Layout your units as shown:
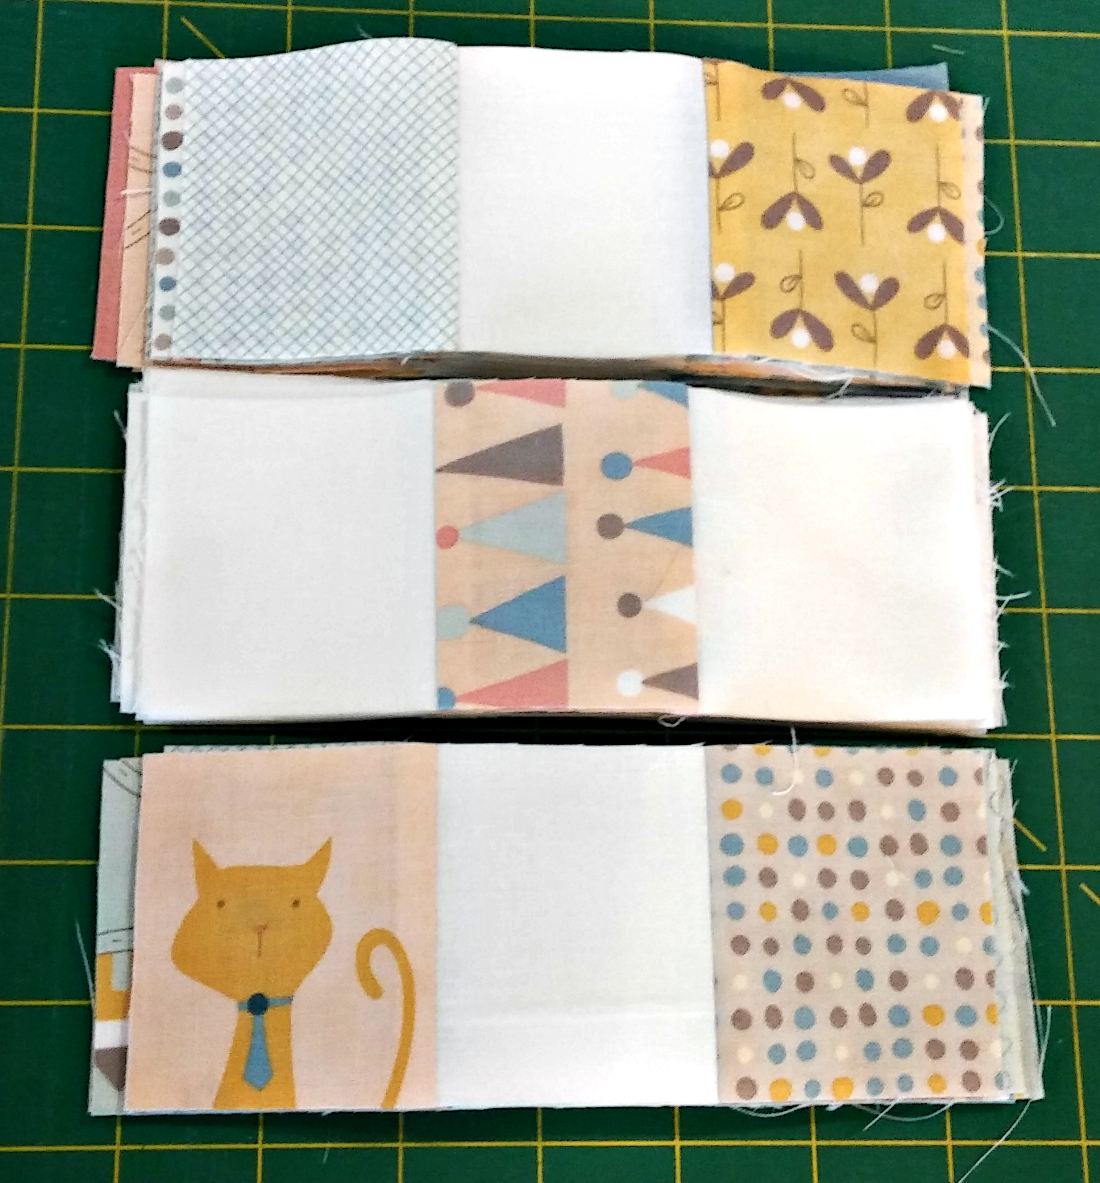
9-Patch Units Ready to Piece
Flip one side unit to the center unit, nest the seams and pin. Stitch, and press seam away from the center. Repeat with the other side unit, nest seams, pin, stitch and press the seam away from the center. The blocks should measure 6½" x 6½".
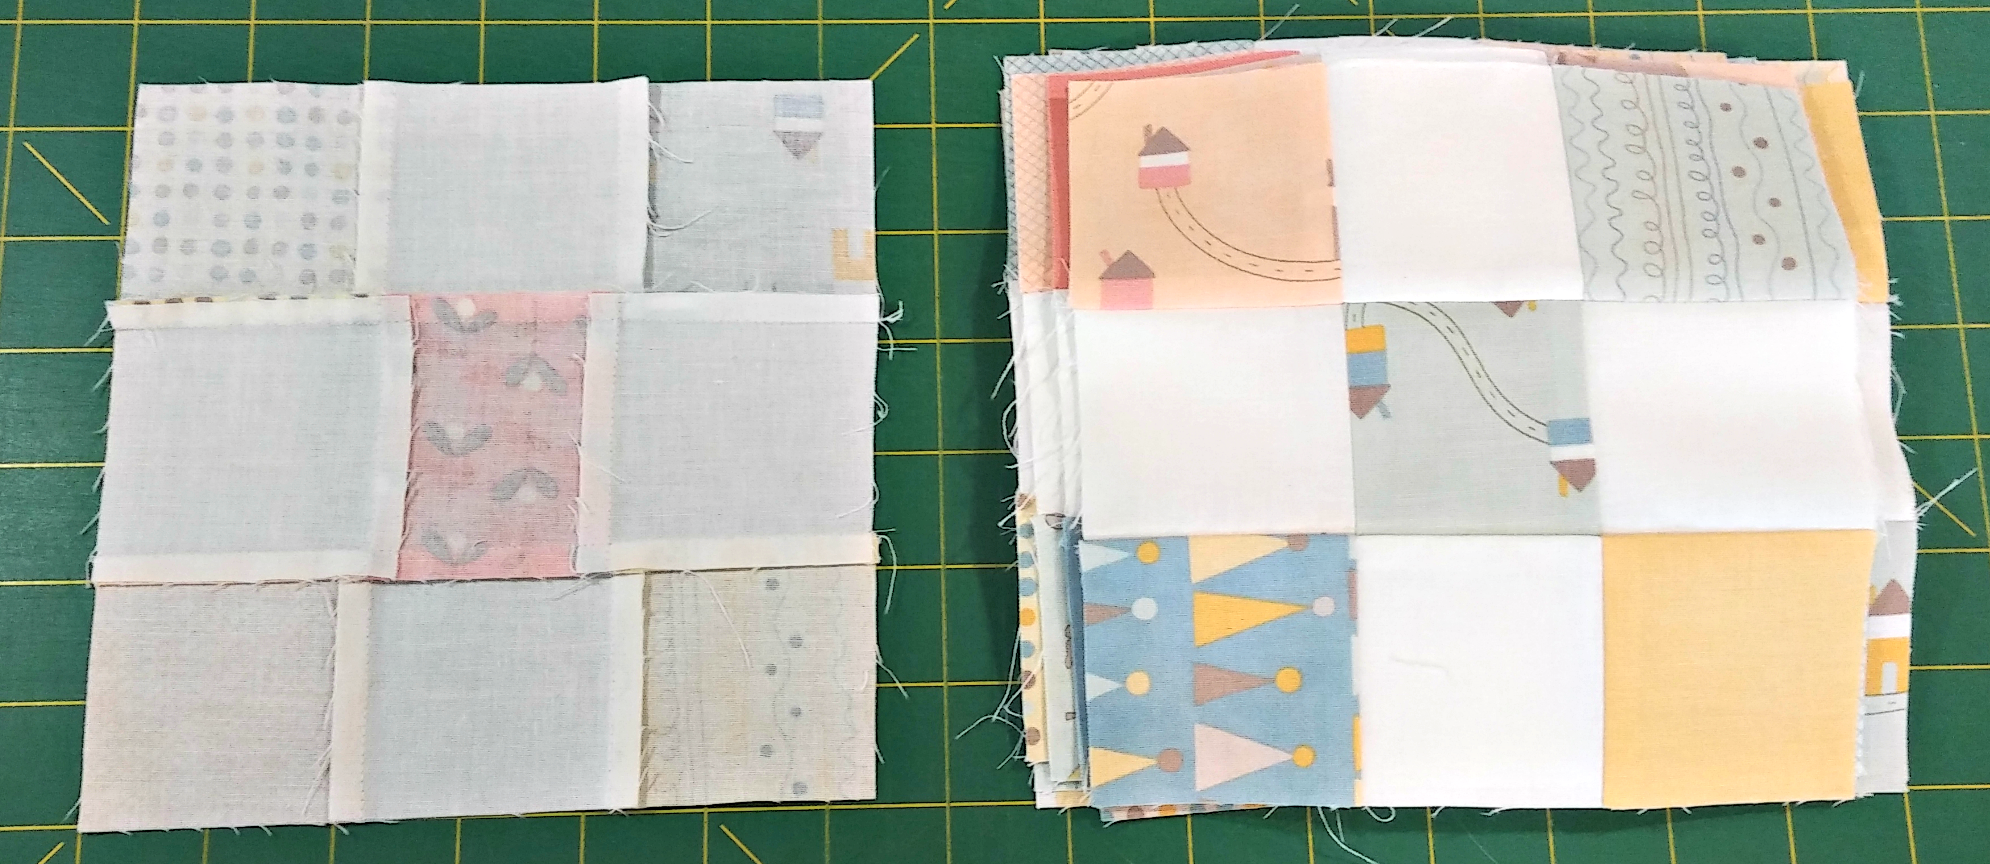
9-Patch Units back pressing & block front
Piece the Snowball Blocks (15):
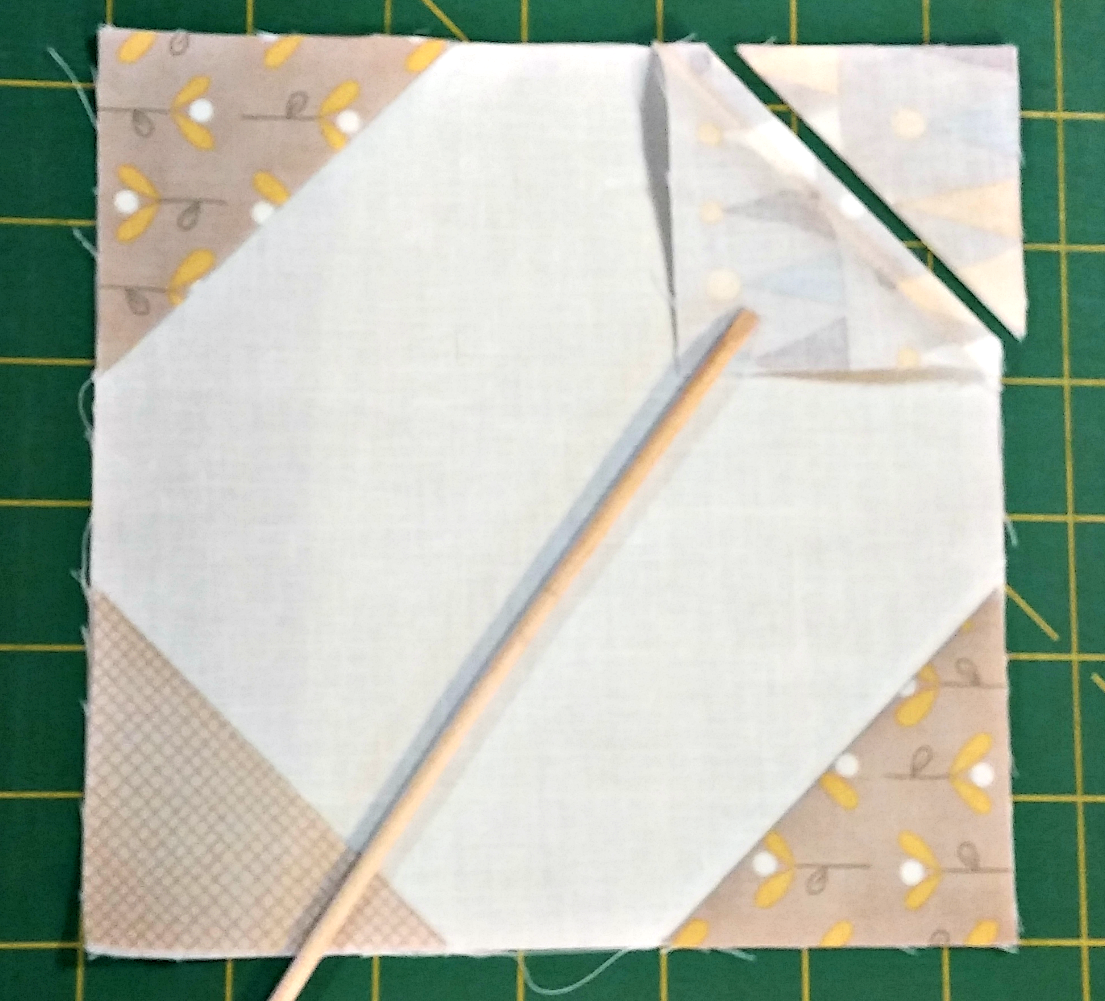
For this block you need the 15- 6½" x 6½" and 60- 2½" x 2½". Draw a diagonal line on the back of each 2½" x 2½", this is the stitch guide line. Place a 2½" x 2½" square wrong sides together on each corner of the
6½" x 6½" square. Stitch one thread from the drawn line closest to the corner. Flip the corner triangle right side up, (match the corner of the small square to the corner of the base square) and press. Then trim the excess 2 layers of fabric from the back of each corner leaving 1/4" seam. (Be sure to NOT cut the top corner triangle! Yep, been there, done that!)

Snowball Block Layout

Stitch one Thread from drawn line
Stitch & Flip
Layout Quilt Center (5 Block X 6 Block):
Follow the diagram alternating the 9-patch and snowball blocks. Stitch each row together, press the seams toward the snowball block. Nest the seams of row 1 & 2, pin, and stitch, press seam in one direction. Continue to add rows in the same manner, pressing as you go. When all rows are joined, give the quilt center a final pressing from the front. Measure your quilt, it should be 30½" x 36½".
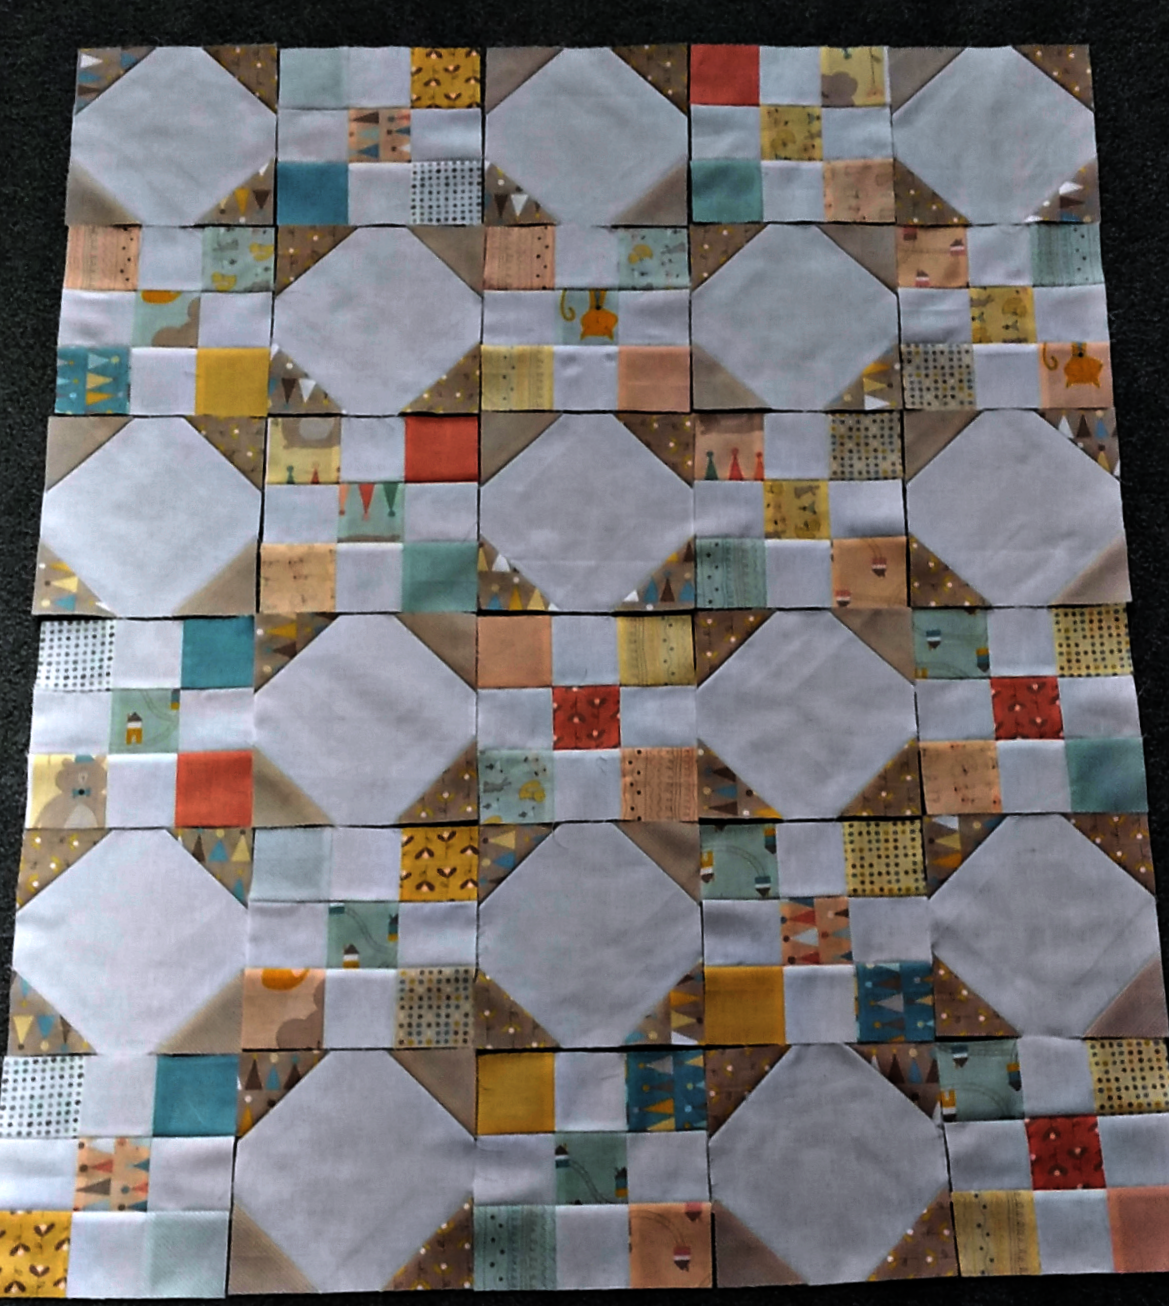
Block Layout for Quilt Center
Adding the Borders:
Border 1:
Using your quilt top measurement, cut 2 - 2½" background strip to size. (Set aside anything you trim off for use in border 3). Pin the border to the top and bottom of the quilt, starting at the ends, middle, and ease to fit. Stitch and press the seam toward the border.
Measure the length of your quilt now and cut 2 - 2½" background strips to this length. Again pin the border to the sides, starting at the ends and middle and ease in pinning across the border. Stitch and press the border toward the border.
Border 1 Attached
Border 2:
Border 2 is a pieced border of 2½" x 2½" squares. For the top and bottom border piece together (2) 17- 2½" x 2½", and for the side borders piece together (2) 22- 2½" x 2½". I like to chain piece these in pairs, the 2 pairs together and so on... till have the number required. Chain piecing is quick! Press the seams in one direction.
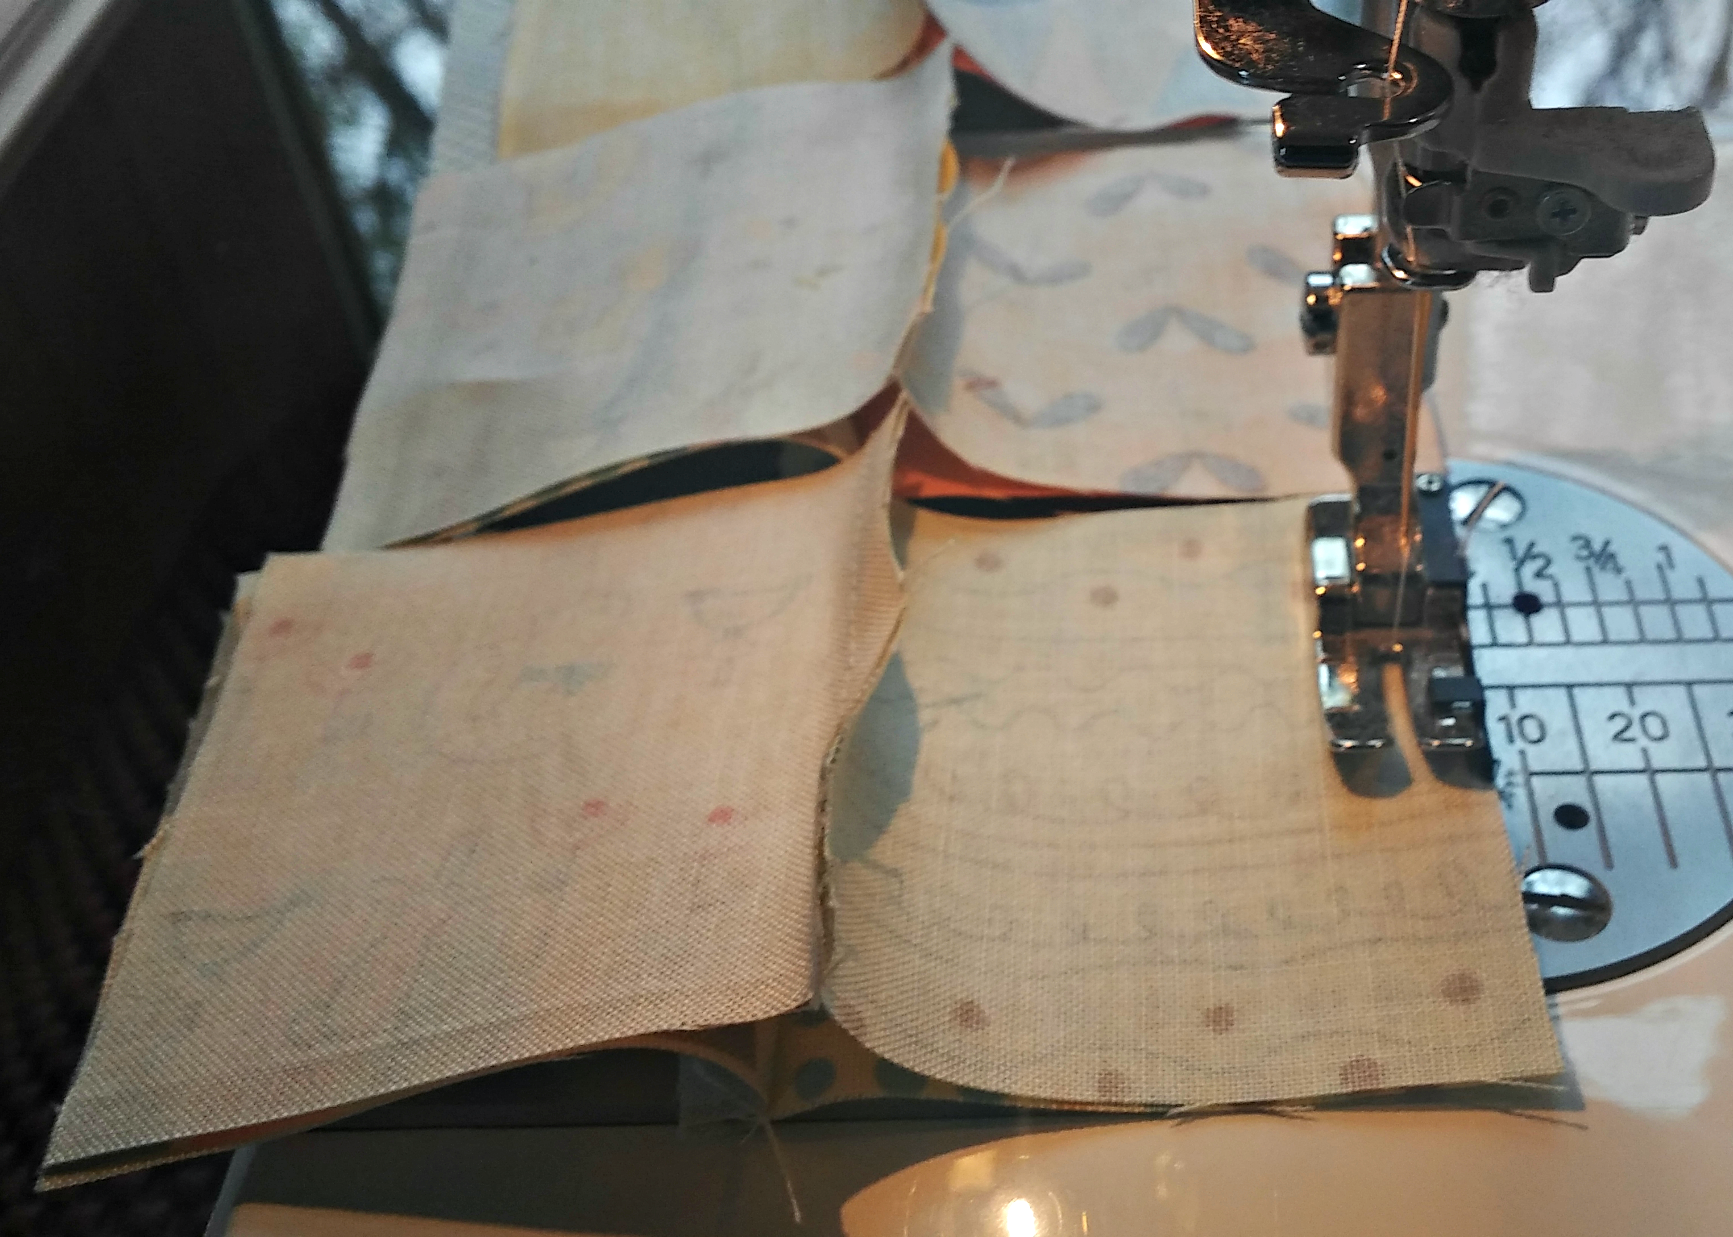
Chain Piece Border Units
Pin the top and bottom borders starting at the ends, center, and pinning across he entire border length. Reverse the direction of the pressed seam to match the 1st block and 1st border. If you find that your pieced border is too big, take a larger seam in multiple places across the border. If the border is too small, in a couple places take smaller seams. Press toward the first border.

Pin Pieced Border
Repeat the same process to add the side pieced borders to your quilt.
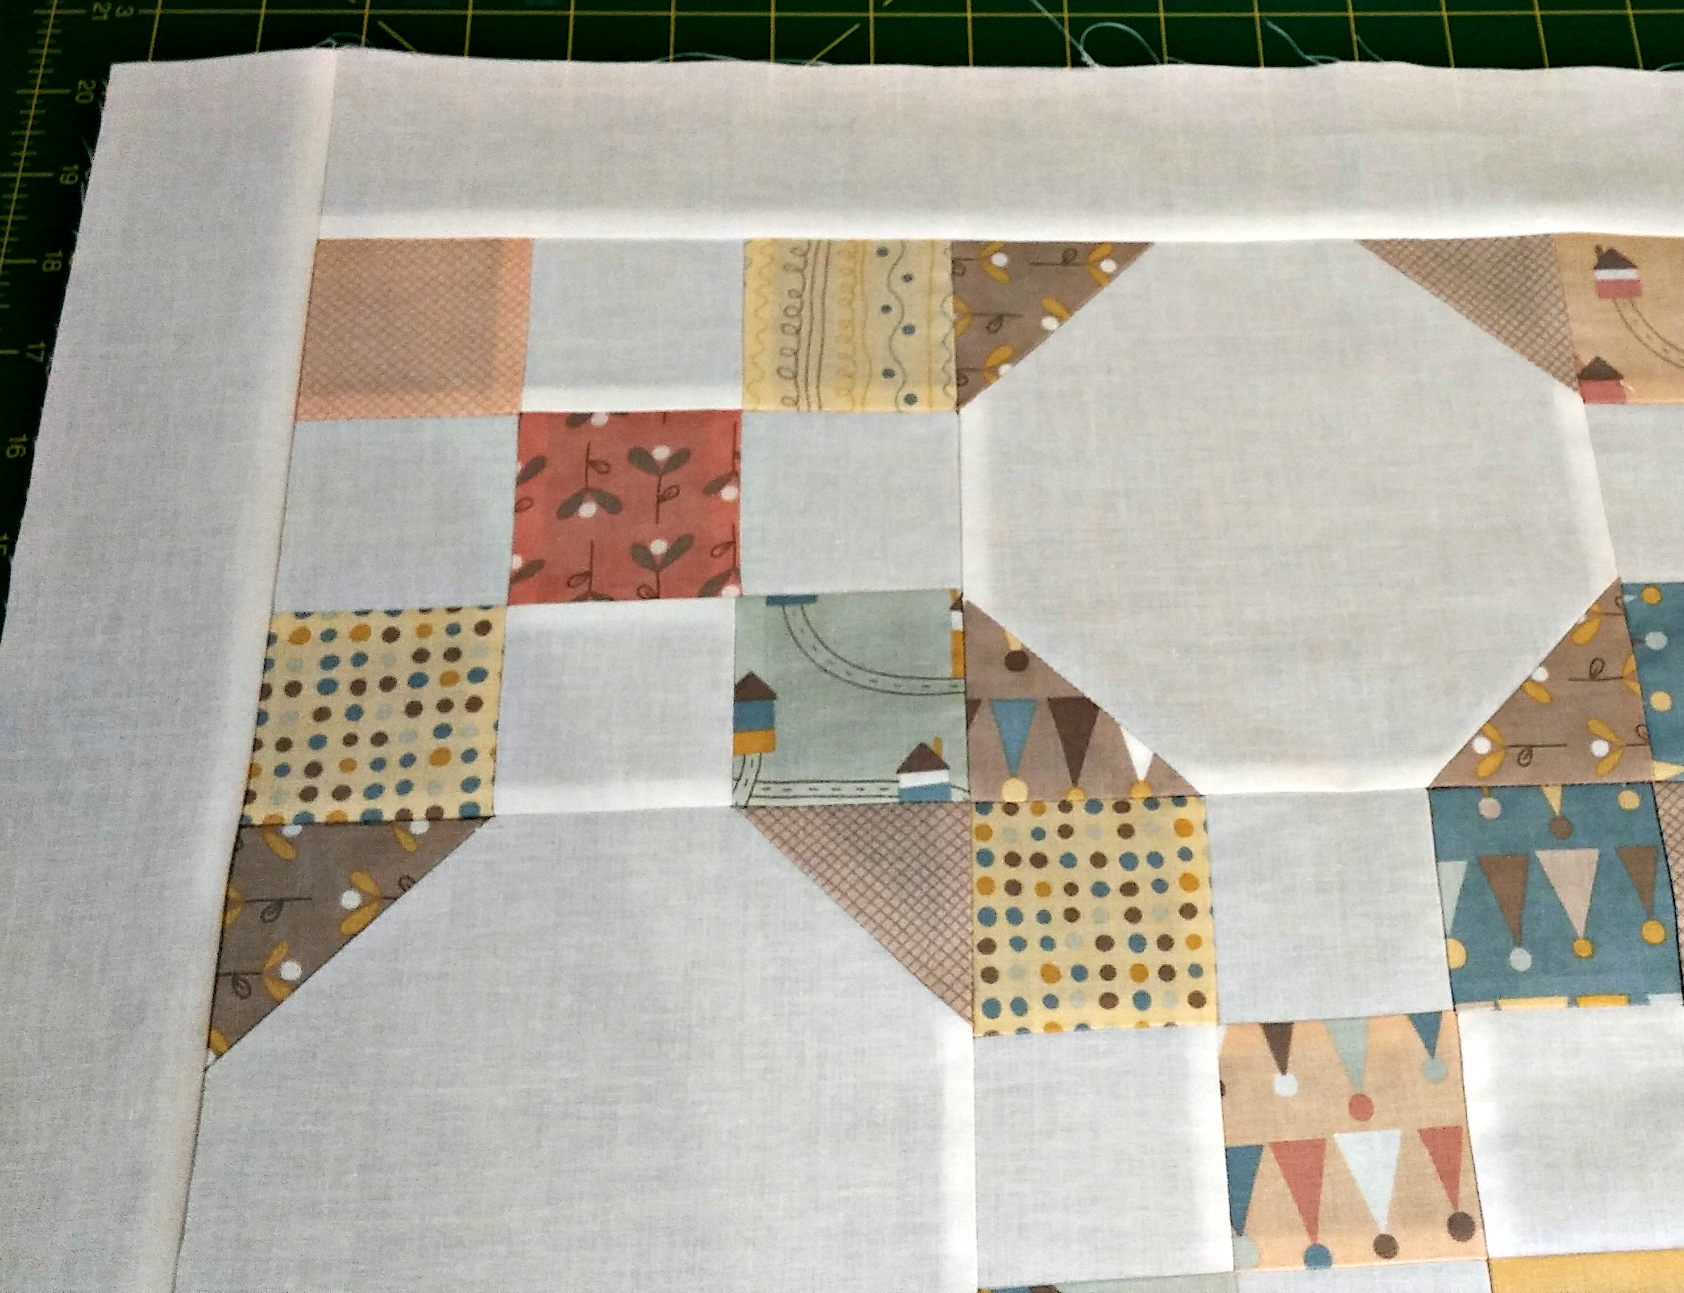
Border 3:
Measure your quilt top and cut 2- 2½" background strips to fit the top and bottom border. Add as in previous border steps, and press to the 3rd border.
Measure the length of your quilt top for the side border length. Using a diagonal seam attach the leftover border fabric from border 1 to the 2 remaining 2½" X 40" border strips. Trim and press this seam open. Cut the 2 border strips to your quilt measurement. As before pin, stitch, and press toward the 3rd border.
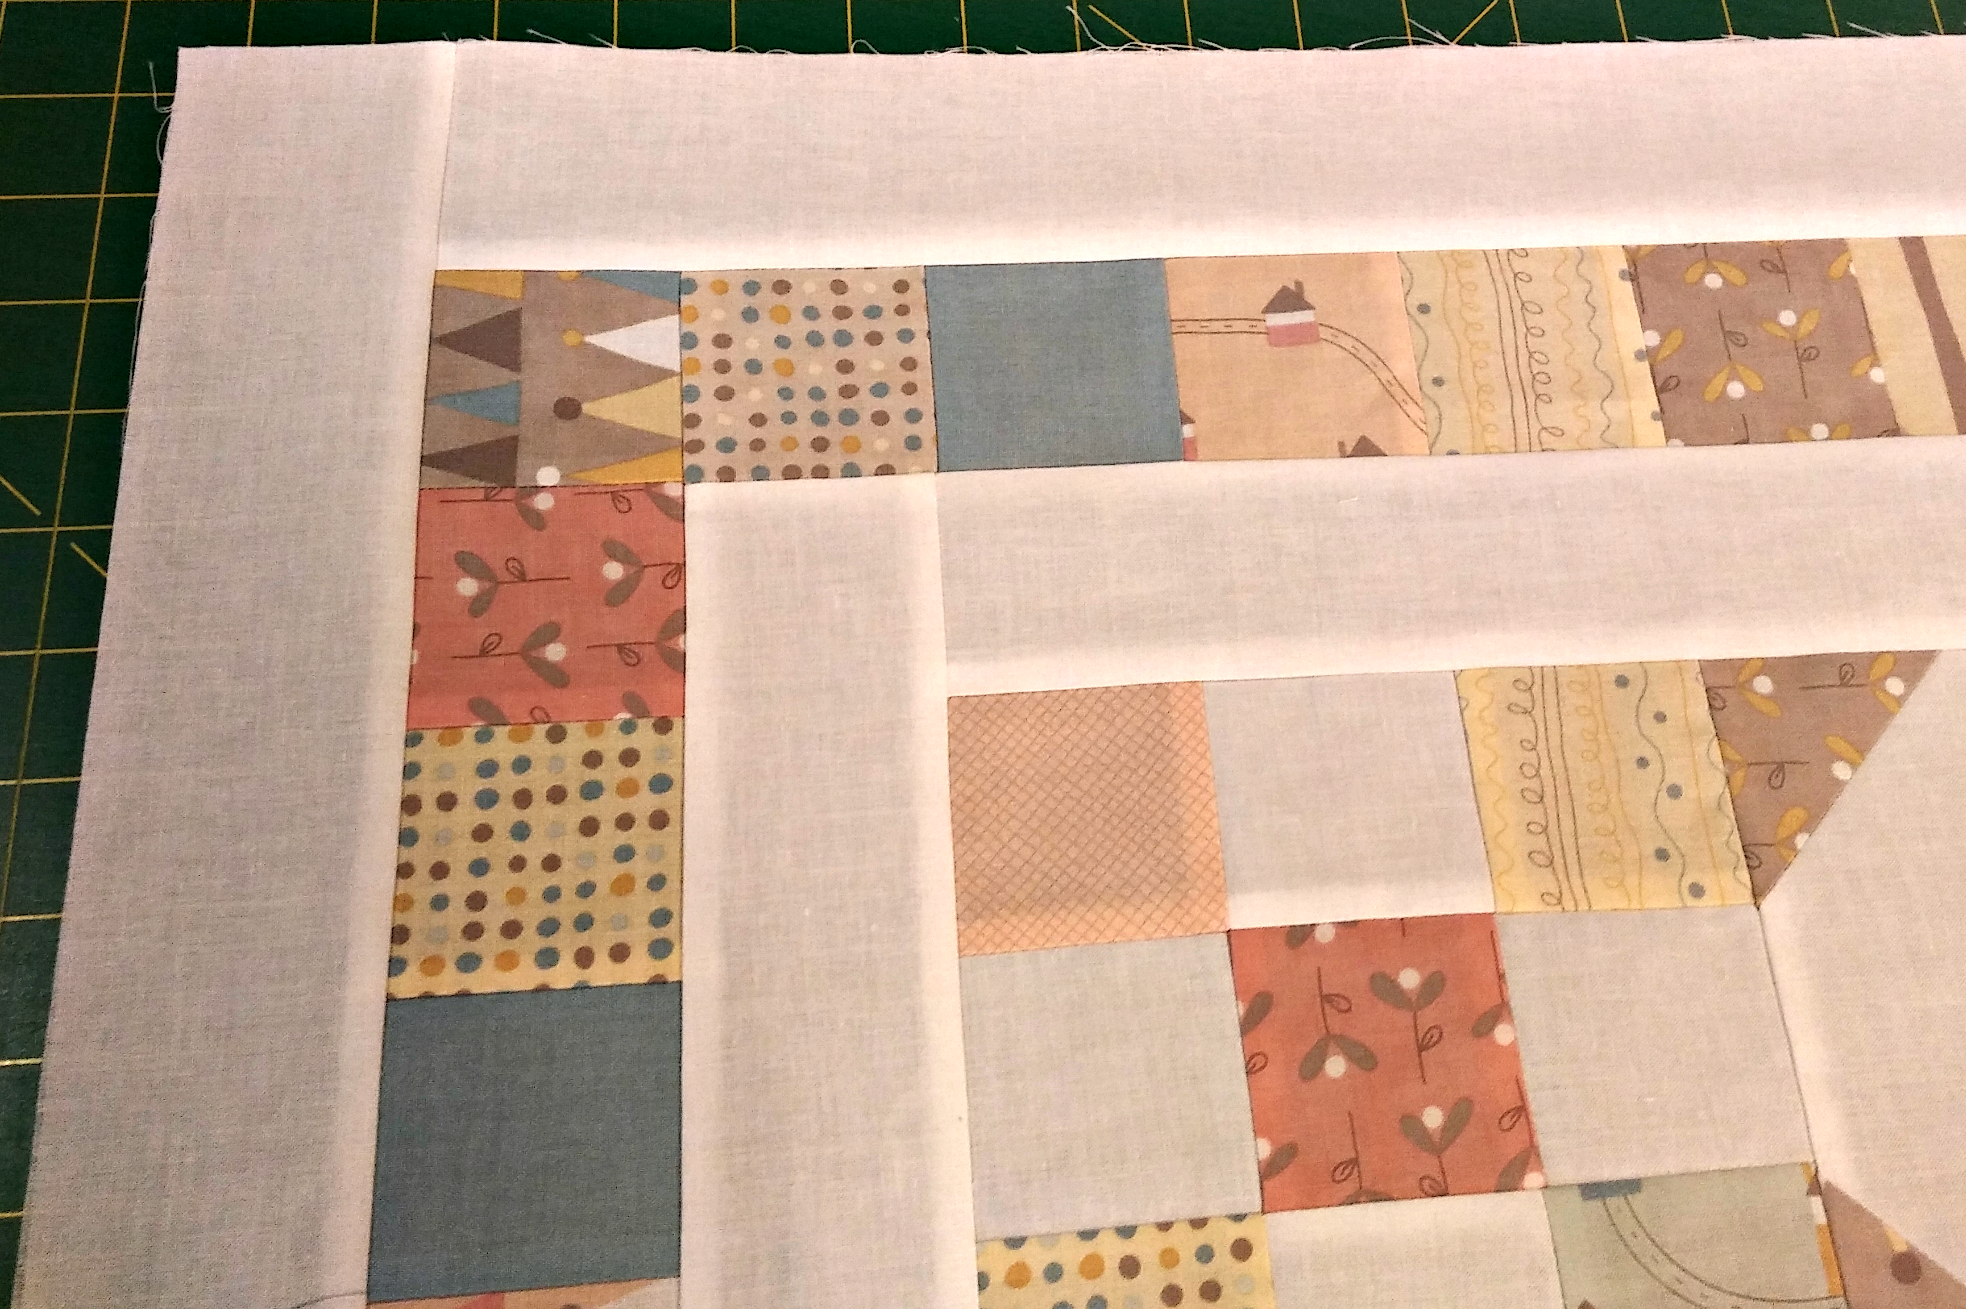
Corner of Quilt Showing all Borders Added
Binding (190"):
For your binding cut 5- 40" strips x 2½" or 2 1/4" (your choice)
Piece the strips together end to end on the 45° angle. Trim leaving 1/4" seam, press the seams open. Press this fabric strip wrong sides together.

Press Seam Open
Attach the binding with a 1/4” seam. Turn the binding to the opposite side and finish by hand or machine.
*I complete most of my bindings by machine. I first attach the binding on the back of the quilt. Then turn the binding to the front of the quilt and pin. I finish by machine with a straight stitch about 1/8” from the edge of the binding on the front. I match my finishing top thread with the binding fabric, and the bobbin thread with the quilt backing.
Backing & Batting:
As a longarm quilter I would recommend the backing & batting for this quilt be about 48" X 54". This give sufficient overage to load the backing onto a quilt frame, and secure the top and batting in place for quilting.
Quilting:
Starry Dreams Quilt Design by Barbara Becker of Four Paws Quilting was used to complete this sweet baby quilt. Superior So Fine Thread's #419 on the top and #401 on the back of the quilt, was used for the quilting.
Other thoughts for this pattern:
This fabulous bundle of Fat 8th's contains enough fabric for two baby quilts! Just add additional fabric for the background and binding. In my second quilt I reversed the placement of the print and background fabrics for a different look.
The snowball block is perfect as signature block. Prior to the final quilting, prepare the snowball blocks by ironing a piece of freezer paper to the wrong side of the block. This will stabilize the fabric for writing. During the baby shower, have pigma pens available for everyone to write a special message to the new baby. A warm iron to the blocks when signed will set the ink.
Or, use the remaining fabric to make burp clothes, a play mat, stuffed animal, diaper bag, trim some hooded towels to coordinate....
![]()
This quilt finishes at 42 1/2" x 48 1/2".
Using the Fat Eighth Bundles allows the pleasure of working with all the fabric in one collection. I love the challenge of taking many fabrics and incorporating them into one quilt. Scrap quilts & traditional blocks are my favorite! Come and check out other patterns in print by Pam Mildren Designs on my website www.pamslongarmquilting.com or at your local quilt shop.
Pam Mildren Designs
www.pamslongarmquilting.com
www.facebook.com/longarmquiltingbypam
![]()
Posted in:
Comments