Welcome to Moda Fabrics!
Countdown to Christmas: Snowman
Countdown to Christmas: Snowman
Published:
Dec 13 2017 - 23:00
![]()
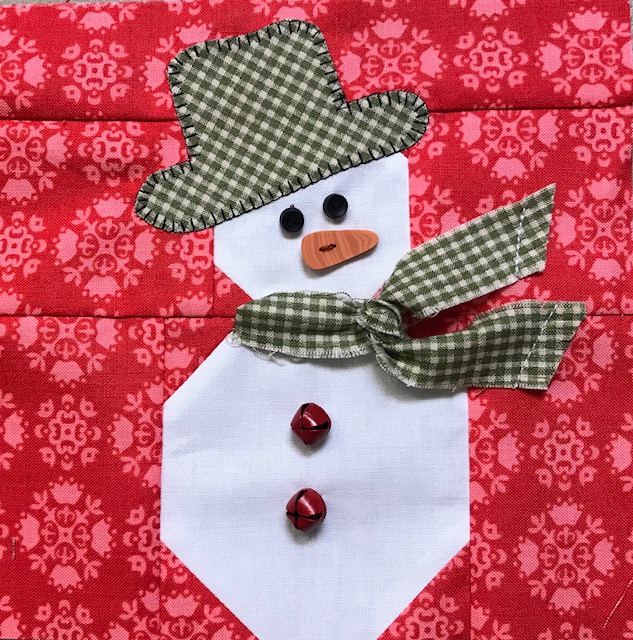
Merry Christmas! I’m Deborah Jacobs of Gathering Friends Quilt Shop. Our quilt shop has been in existence for almost 20 years and we carry many of Moda's gorgeous lines. You will find our books and patterns on our website www.GatheringFriendsQuiltShop and also our etsy site. The "Snowman" block is an awesome addition to Moda Bake Shop’s Countdown To Christmas, especially if you choose to add the extra details!
This block finishes at 6" (6½" unfinished).
![]()
Fat Quarter of White fabric
Fat Quarter of Red fabric
Fat Quarter of Green fabric
Fusible web for hat
![]()
2 jingle bells for body
carrot button for nose
2 black buttons for eyes
flower button for hat
![]()
From red:
- (4) 1" squares
- (4) 1¼" squares
- (1) 1½" x 6½" rectangle
- (2) 2" x 3½" rectangles
- (2) 2½" squares
From white:
- (1) 2½" square
- (1) 3½" square
From green:
- 1" x 10" strip for scarf
- 3" square to cut hat from
ASSEMBLY:
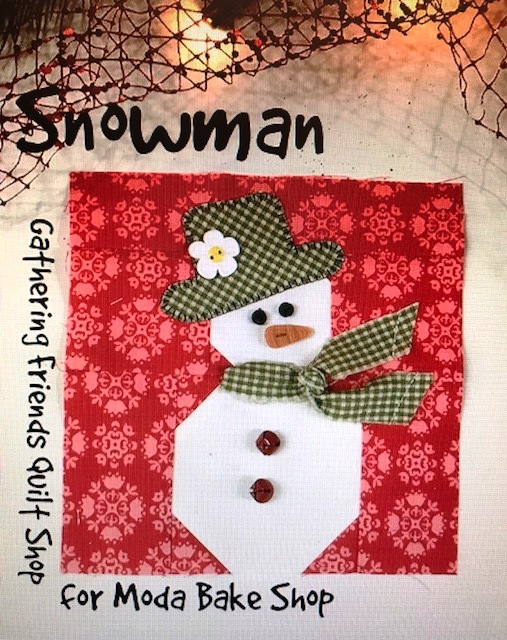
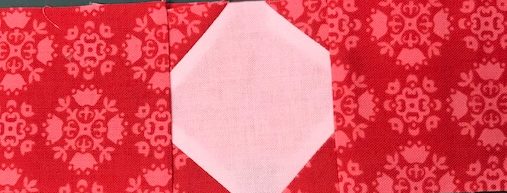
Position a 1" red square on opposite corners of a 2½" white square, as diagrammed. Draw a diagonal line from corner to corner and stitch on the line.
Trim seam allowance to ¼". Press seams open. Repeat procedure on remaining corners.
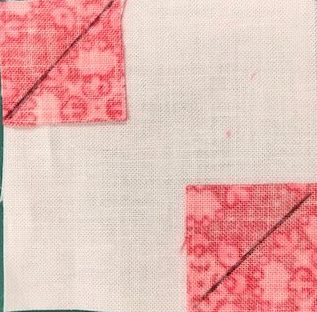
Proof to 2½". Make 1 snowman head.
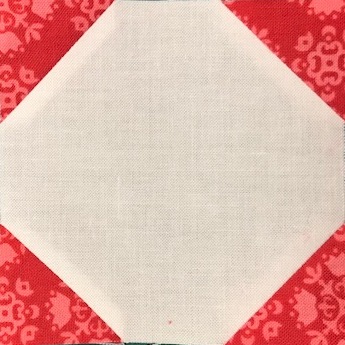
Repeat above procedure for snowman body using the 3½" white square and the 1¼" red squares. Proof to 3½". Sew a 2" x 3½" red rectangle to each side of the snowman body.
Sew a 2½" red square to each side of the snowman head. Press the seams toward the red squares. Make one section.
Sew the 2 sections together. Sew a 1½" x 6½" red rectangle to the top. press seams away from center.

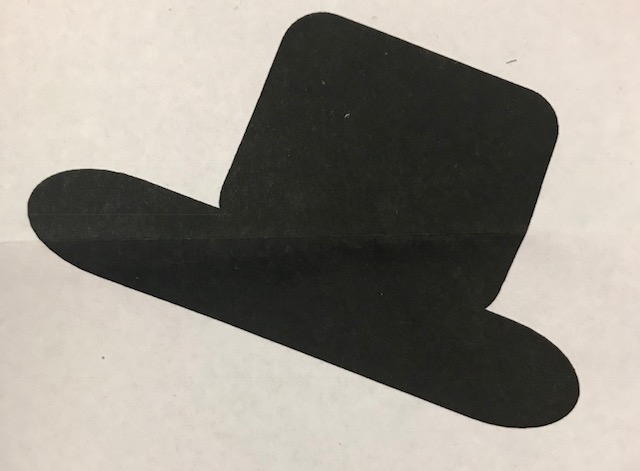
Trace the hat template below (or use your own) on the paper side of the fusible web. Following the manufacturer's directions, apply the fusible web shape to the wrong side of the green fabric. Cut on the traced line and remove the paper backing.
Position on the quilt and press with a hot iron. Buttonhole stitch around the hat using a medium stitch length and width. Hint: Place tear away on the bottom of your block for stability when machine appliqueing.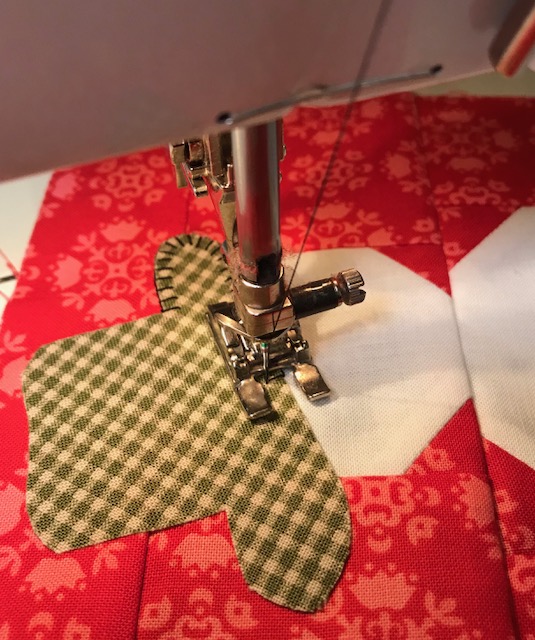
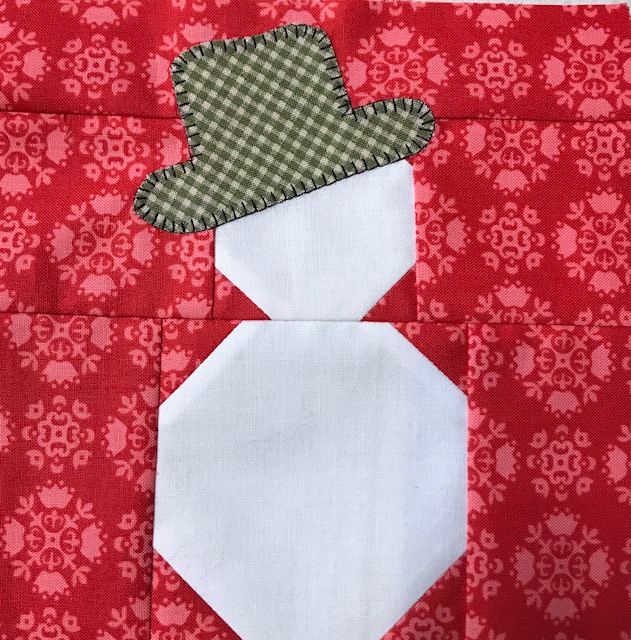
Finally add embellishments of your choice to finish this block. I added 2 small black buttons for eyes, a carrot button for his nose, 2 red jingle bells to his belly, and a daisy button to his hat. Then I folded the 1" x 10" green strip for the scarf and stitched in place by hand. When I decided how to place the scarf ends I stitched down the ends with my machine.
![]()
This block is 6½".
Be sure to check out Gathering Friends for more inspiration!
Deborah Jacobs
![]()
Posted in:
Comments