Welcome to Moda Fabrics!
December 19: Festive Frosty
December 19: Festive Frosty
Hi, Everyone! Jessica Dayon- @jessicadayon- here. Today I'm sharing the tutorial for my block called Festive Frosty! The directions are for a 12" block. Let's get started!
This block finishes at 12" square.

| 12" Block | |
|---|---|
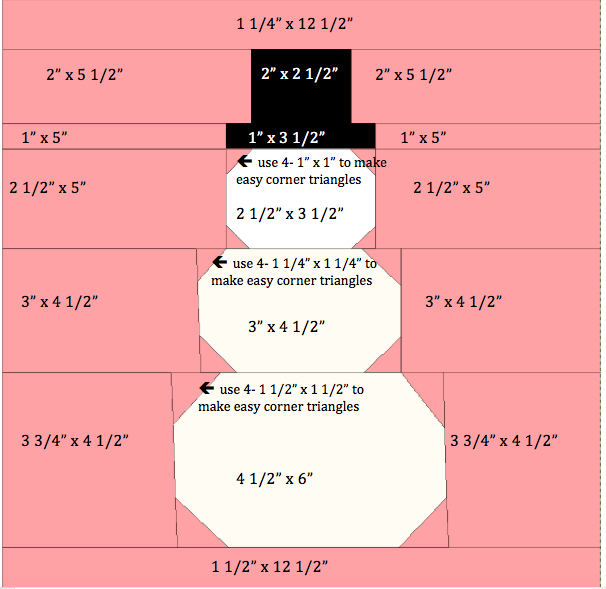
| A - Pink Background Fabric | 1- 1 1/4” x 12 1/2” 2- 2” x 5 1/2” 2- 1” x 5” 2- 2 1/2” x 5” 4- 1” x 1” 2- 3” x 4 1/2” 4- 1 1/4” x 1 1/4” 2- 3 3/4” x 4 1/2” 4- 1 1/2” x 1 1/2” 1- 1 1/2” x 12 1/2” |
| B - White Fabric | 1- 2 1/2” x 3 1/2” 1- 3” x 4 1/2” 1- 4 1/2” x 6” |
| C - Black Fabric | 1- 2” x 2 1/2” 1- 1” x 3 1/2” |
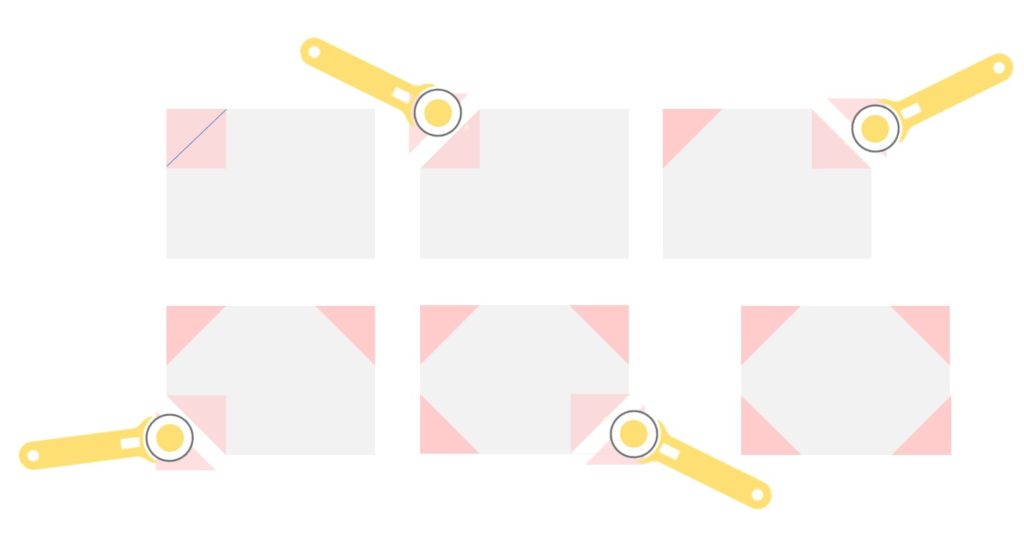
Easy Corner Triangles

Using the 4- 1" x 1" pink squares and the 1- 2 1/2" x 3 1/2" white rectangle, make an easy corner triangle in each of the 4 corners of the white rectangle.
Repeat these steps with the 4- 1 1/4" x 1 1/4" pink squares and the 1- 3" x 4 1/2" white rectangle. Repeat the steps again with the 4- 1 1/2" x 1 1/2" pink squares and the 1- 4 1/2" x 6" white rectangle.
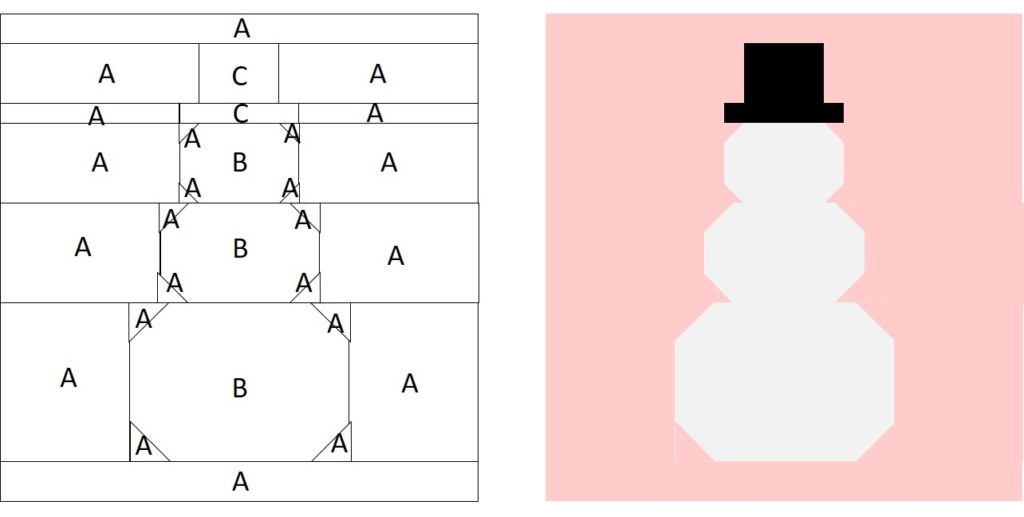
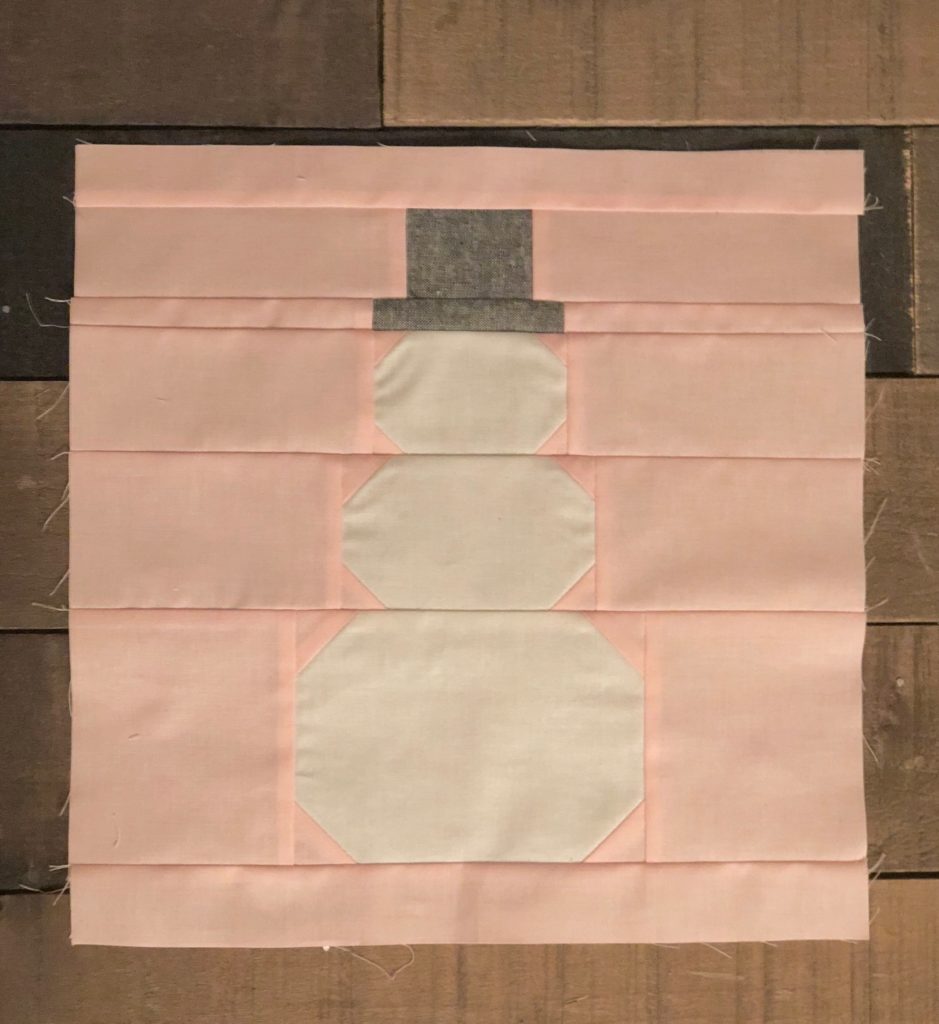
Lay all of the pieces out as shown and assemble the block into horizontal rows and then sew the rows together to make the block.
You can embellish the snowman as you desire! I haven't decided exactly how to embellish mine but I'll be sharing on Instagram as soon as I do!
This block finishes at 12" square.
Thanks for following along with me today! I hope you enjoyed this block and continue to enjoy all of our Countdown to Christmas block patterns! Come, follow me, and see what I'm up to on Instagram @jessicadayon.
Jessica Dayon
{blog: Jessica Dayon Blog}
{instagram: @jessicadayon}


Comments