Welcome to Moda Fabrics!
How to Make a Yo-Yo With Moda
How to Make a Yo-Yo With Moda
Published:
Jun 20 2023 - 10:30
Looking for a quick and easy way to add a dimensional embellishment to your sewing and quilting projects? Look no further! Today we’re sharing a little tutorial on how to make our new favorite embellishment: the fabric yo-yo!
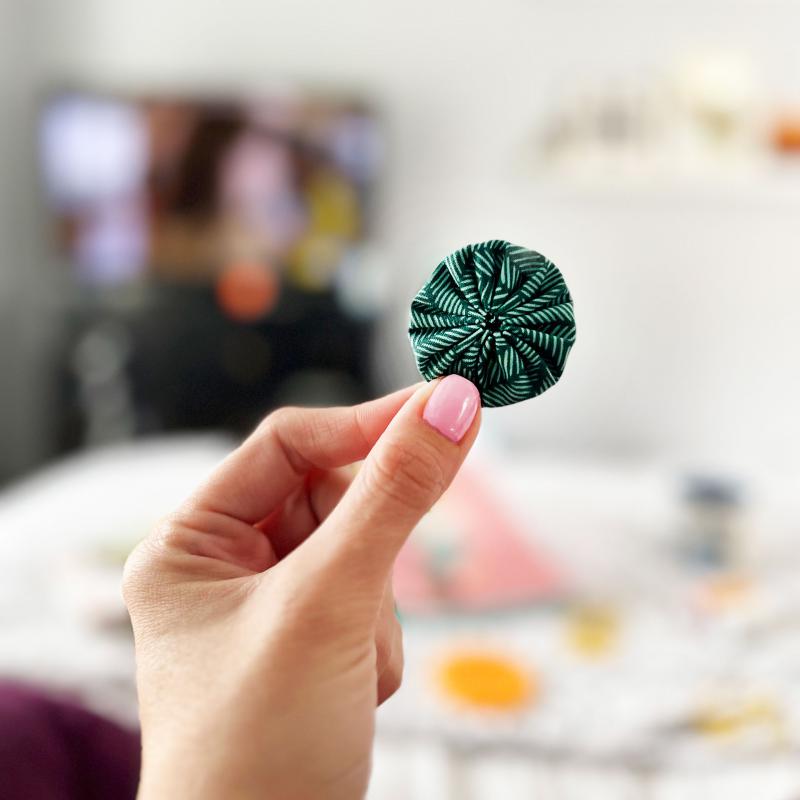
Fabric yo-yos are having a moment right now – and it’s no surprise. Not only are they quick and easy to make, but they’re also endlessly versatile and flat-out fun. So grab a Clover Yo-Yo Maker, a charm pack, and a needle and thread, and let’s get started!
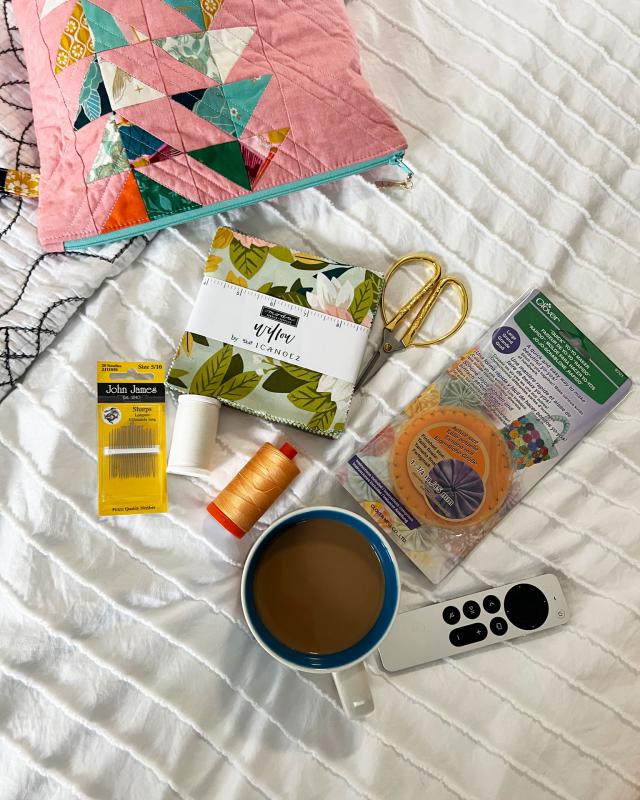
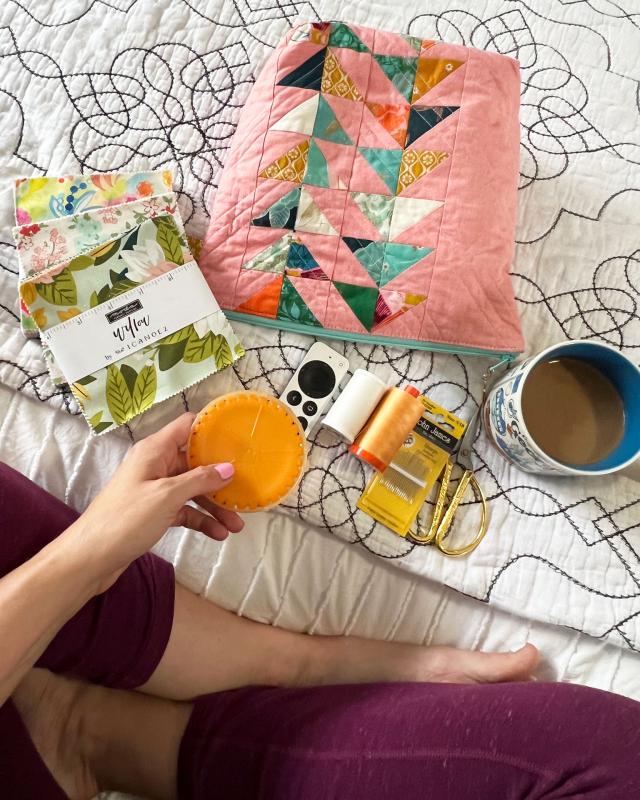
What you’ll need:
- Clover Yo-Yo Maker (we’re using the large yo-yo maker for this tutorial, but they’re available in a range of sizes)
- A charm pack or assorted 5” scraps
- Needle
- Thread (Any color is fine – the thread is not visible in the finished yo-yo)
- Fabric snips
Your Clover Yo-Yo Maker includes two pieces that snap together: a smaller inner disk and a larger outer tray. See those long lines on the disk? You’ll want to make sure that they are pointing to the notches on the tray when you snap the two pieces together.
First, sandwich a charm pack (or roughly 5” piece of scrap fabric) between the disk and the tray. Make sure your fabric is right side down and the disk lines are aligned with the tray notches. Snap the disk into the tray.
Carefully trim away the excess fabric around the tray, leaving about a ½” seam allowance (it doesn’t have to be exact!).
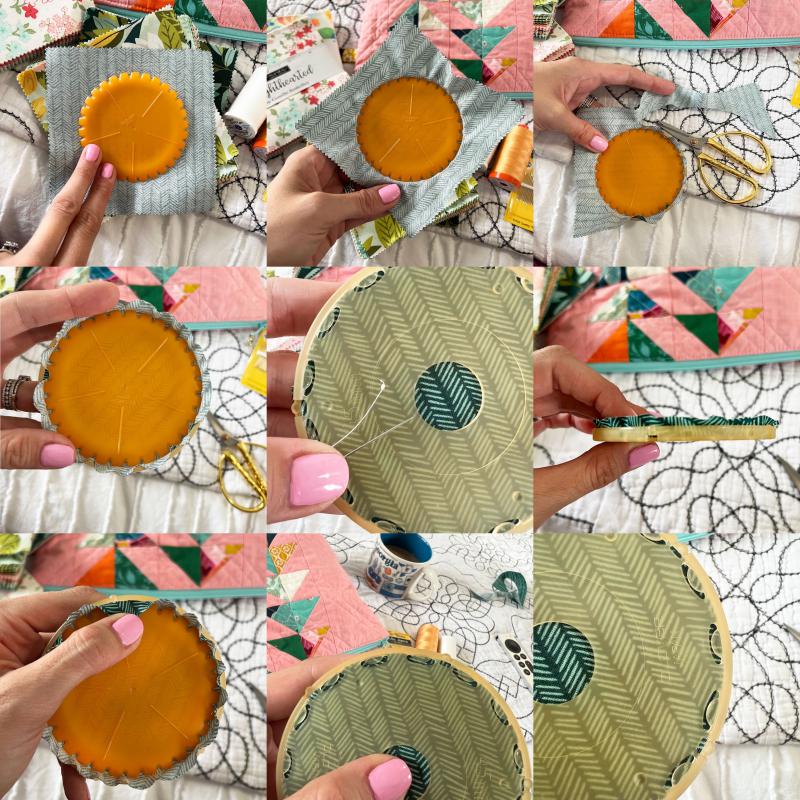
In the images above, you can see that we’ve left enough fabric after trimming to fully cover the notches on the inner disk. Make sure that you’re holding down the fabric seam allowance like this as you’re stitching around the template!
Pro tip: We like to use oversized knots at the end of our thread when making yo-yos – that helps keep the knot from popping through the fabric.
In last two pictures above, you can see the stitching guides around the outer tray. These guides will help you create perfectly sized and spaced gathering stitches.
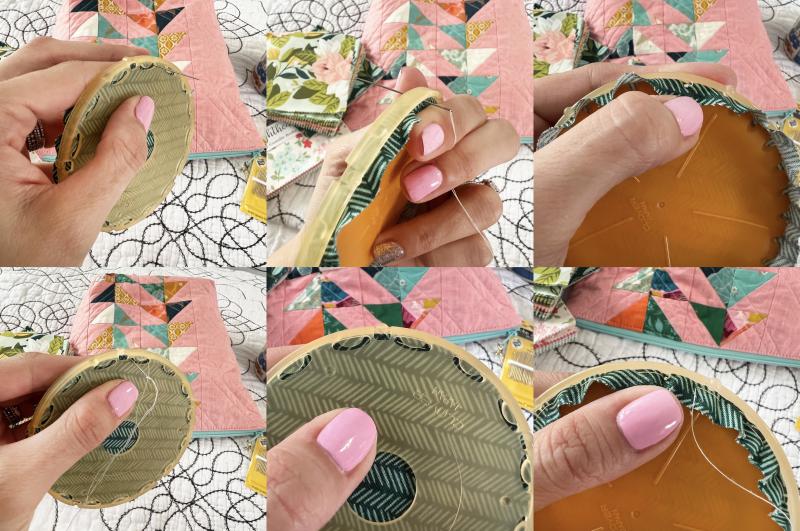
Insert your needle and thread up through one side of one of the stitching guides (it doesn’t matter where you start), catching the seam allowance on the back of the yo-yo maker, and back down through the other side of the same stitching guide. Make sure your stitch is within the stitching guide and does not cross over the plastic between the guides in the tray, or you won’t be able to remove your fabric when you’re done!
Continue stitching all around the template, ending with your needle and thread on the back (plate) side of the template, as shown in the last picture above.
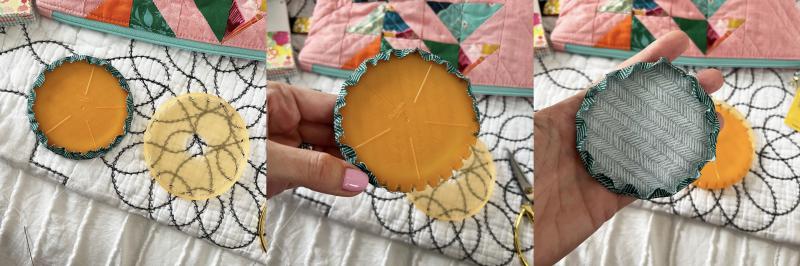
Carefully pop the disk out of the tray and remove the disk from your stitched fabric circle.
Gently pull on both ends of your stitching thread to gather the stitches and form the fabric yo-yo. The seam allowance will mostly fold under itself and hide the raw edge, but you may have to guide it with your fingers just a little bit.
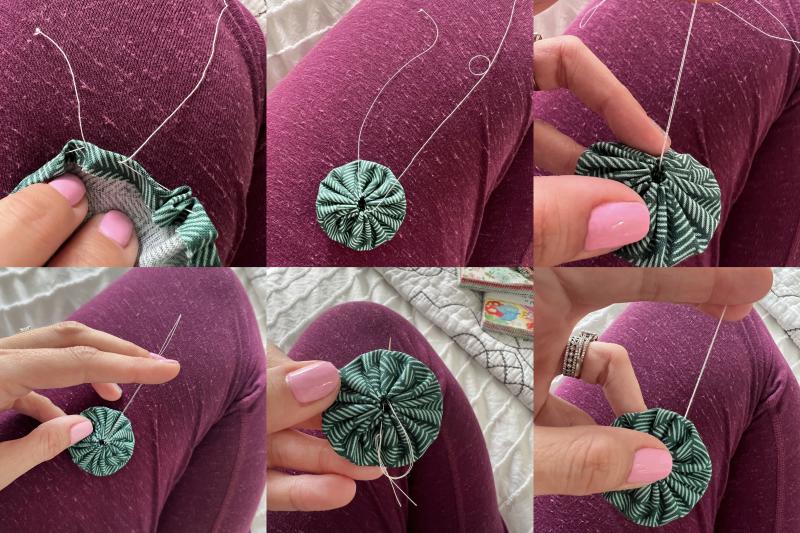
After you’ve pulled the threads tightly to form a yo-yo, knot the threads close to the fabric, trim the thread tails to about 4”, rethread your needle, and take the thread tails through the side of your yo-yo by guiding your needle through the open center of the yo-yo.
(If you’re planning to stitch your yo-yos onto a quilt or other project, you can leave those thread tails a little longer than 4” and use them as your stitching thread to attach your yo-yo!)

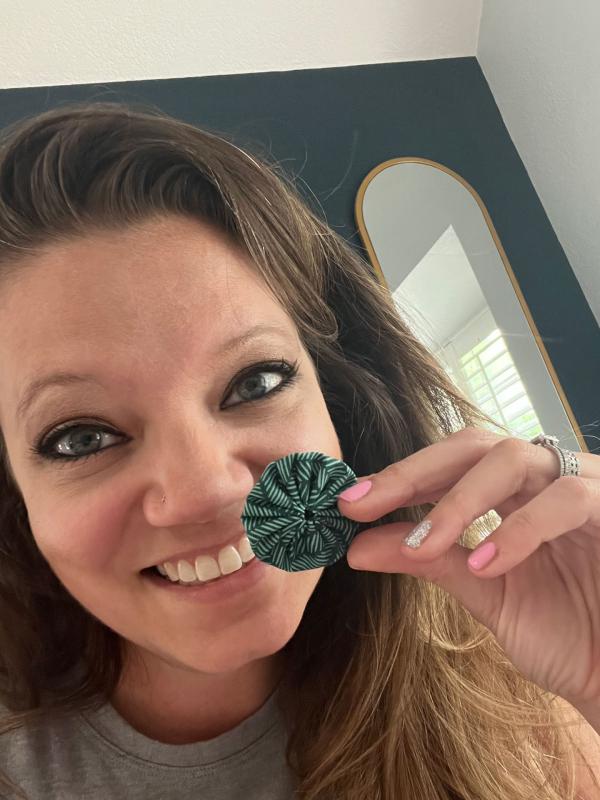
And there you have it! Your first yo-yo – but certainly not your last. We promise you that this is an addictive little hand-stitching project that’s perfectly portable for keeping your hands busy on the couch, on outdoor adventures, sitting in waiting rooms, or wherever you find yourself in need of something stitchy to work on.

Now it's your turn! Show us how you're using fabric yo-yos to embellish your quilts and other projects. Tag us on social media and be sure to use the hashtag #FabricYoyosWithModa !
And if you're in Chicago for the h+h americas show, swing by the Moda booth to see a live demo of the Clover Yo-yo Maker in action.
Posted in:
Comments