Welcome to Moda Fabrics!
Make & Take - Rings & Bitsys
Make & Take - Rings & Bitsys
Published:
Aug 27 2021 - 14:20
Some projects need just a few pieces that are {this big}. Or several small pieces.
We love charm packs, but not when we need strips that are 10" to 12" long. And we're pretty sure that you can't get a 5" square from a Jelly Roll. Mini charms? They're really cute, and perfect for some projects. But when we want options, we usually reach for a Layer Cake.
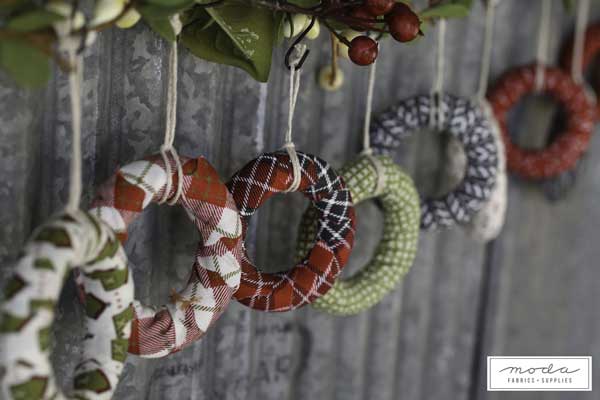
We shared this image of a Wrapped Ring Garland on social media a few weeks ago, and it resulted in a lot of requests for a tutorial. After chatting with Lisa of Sweetwater to get specifics on sizes, tools, etc., we started cutting strips and wrapping rings so we could share the how-tos with you.
Supplies.
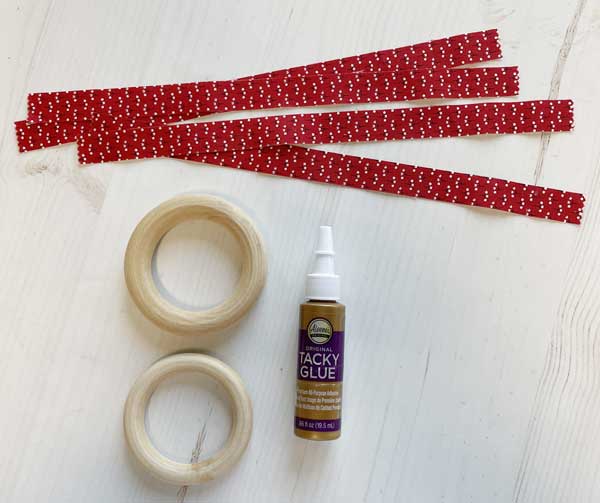
- Rings. The Sweetwater garland was made using 2½" wood craft rings. (Those are on the bottom.) On a whim, I also got a package of 3" rings. Depending on where you buy the rings, the package can have a dozen or more rings.
- Strips. I cut 4 strips measuring 5/8" x 10" from each fabric. (More on this below.)
- Adhesive. I experimented with Aleene's Tacky Glue, glue sticks, E6000 and ModPodge. All of them worked, but the Tacky Glue was the easiest to use. Having the glue adhere the strip to the wood made starting easier, but the most important thing was a glue that would seal the end of the last strip to the fabric-covered ring.
- String. Cotton string or crochet cotton to hand the rings from a garland, or tie them to a wreath.
- Garland or wreath.
About the strips. The length and the width are flexible. With the Layer Cake, the 10" strip length worked well. To see if there was a difference in how the strips wrapped, and how many I would need, I cut strips ½" and ¾" wide. After wrapping almost fifty rings, I didn't see a big difference in how easily the strips wrapped the rings, or in the finished appearance of the ring.
As for the number of strips needed for each ring, that will depend on how closely the wraps are spaced. A few of my 2½" rings used three strips, while others only used two. The 3" rings used three or four strips.
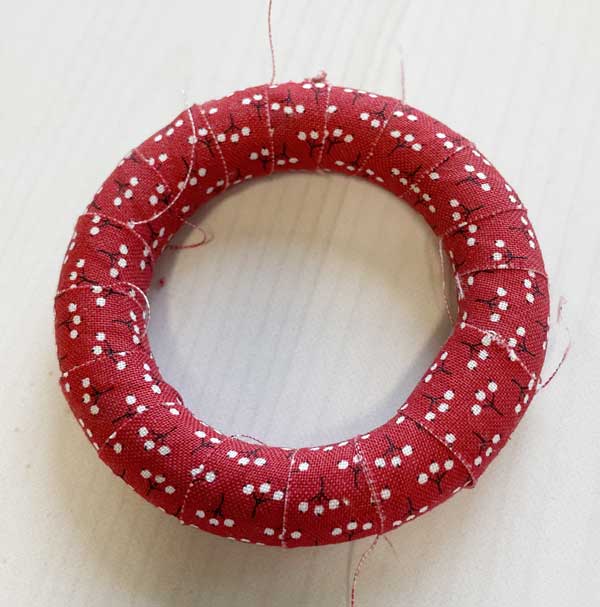
This is an example of a ring that is loosely wrapped - each new layer just overlaps the edge as it is wrapped.
And yes, a little clean-up of loose threads will be required when you're finished.
To start, use a tiny bit of glue to adhere the end of a strip to the wooden ring. Then wrap the strip around the ring until you reach the end of the strip. I used a dot of glue to adhere the strip to the ring, and to adhere the next strip. A sweet friend who helped wrap rings only used the first dot of glue. Continue wrapping strips until the ring is covered, and you've reached the end of the strip. Secure the end with one more bit of glue.
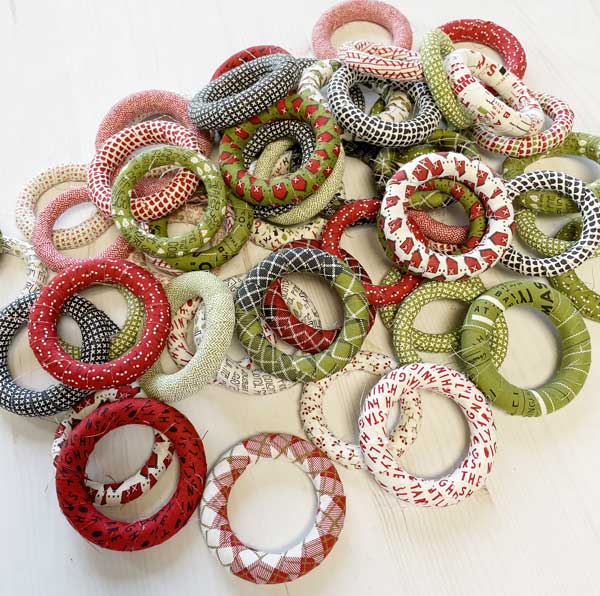
We wrapped a lot of rings. Now I just have to wait until I can find a pretty garland to tie these to. I might need two garlands.
So after cutting a couple of strips off the Layer Cakes, I still had more than half of each square left over. So what to make?
That was an easy choice - Bitsy Boxes! And a couple of Bitsy "hacks".
(Yes, I did pull out a few different Layer Cakes. There might be a few more projects to share in the coming weeks... just saying.)
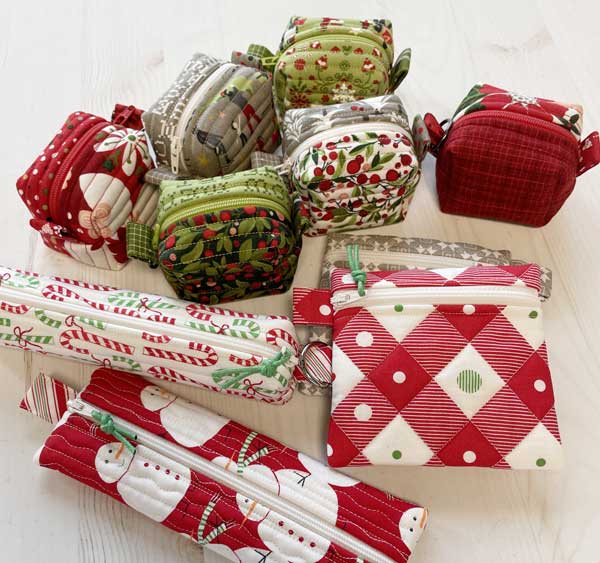
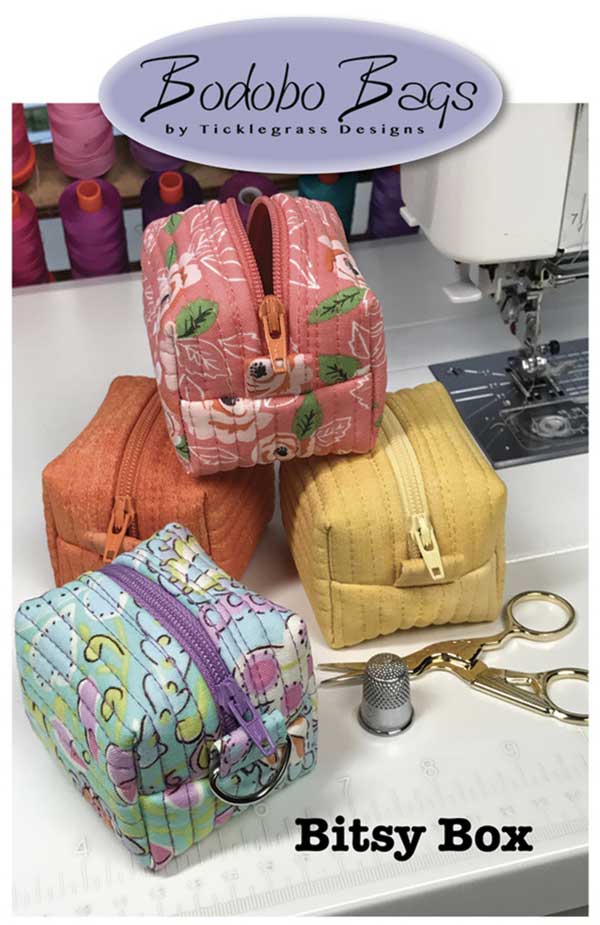
All of these little bags were made from the base unit used to make Bitsy Boxes - from this pattern by Natalie Rawlinson of Tickegrass Designs. The pattern is required to make these, this is to share a few ideas and options for making them.
One Layer Cake square - 10" x 10" - yields the pieces for the outside of the bag, and two matching tabs. Since I had cut off 2" to 3" of each square, I used a different fabric for the tabs. An additional rectangle is required for the inside of the Bitsy Box.
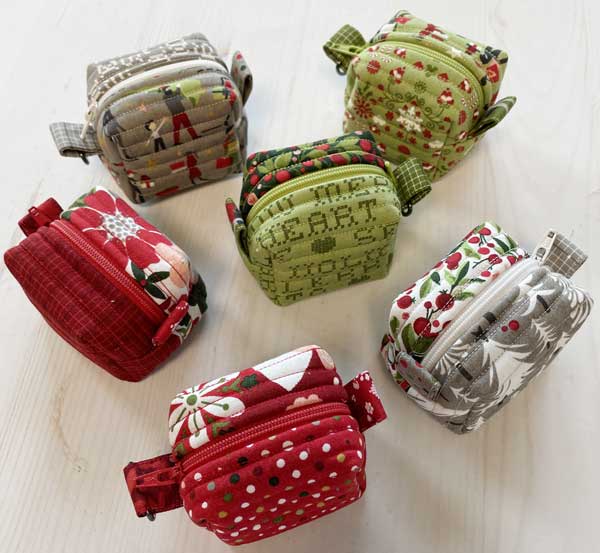
Last year, Natalie shared Bitsy Boxes she'd made by piecing two charm squares to make her rectangle. While it wasn't as wide as specified, she could still trim it to the required size after machine-quilting the layers. So I cut squares from my Layer Cakes so I could piece the necessary rectangle.
Bitsy Option No. 1.
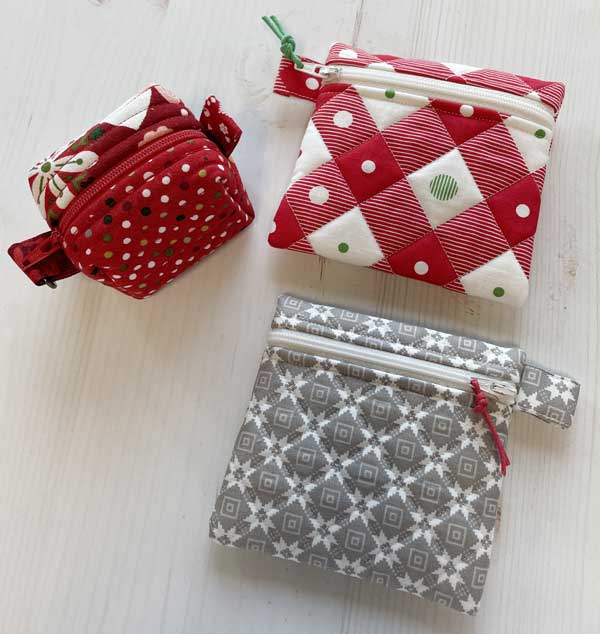
Follow the instructions in the pattern through Step 5. On Step 6, instead of folding the piece in half to find the center, fold the box so that the zipper is ¾" from the fold. (And try to align it so the zipper is on the same side for both Flat Bitsys.)
On Step 7, place the tab in the seam just below the fold on the side with the zipper pull when it is closed. Follow Steps 8 and 9 to complete the Bitsy as they are the same, the only difference being that the zipper will be off-center. Zigzag the seams, and turn the Flat Bitsy right side out.
Bitsy Options No. 2 and 3.
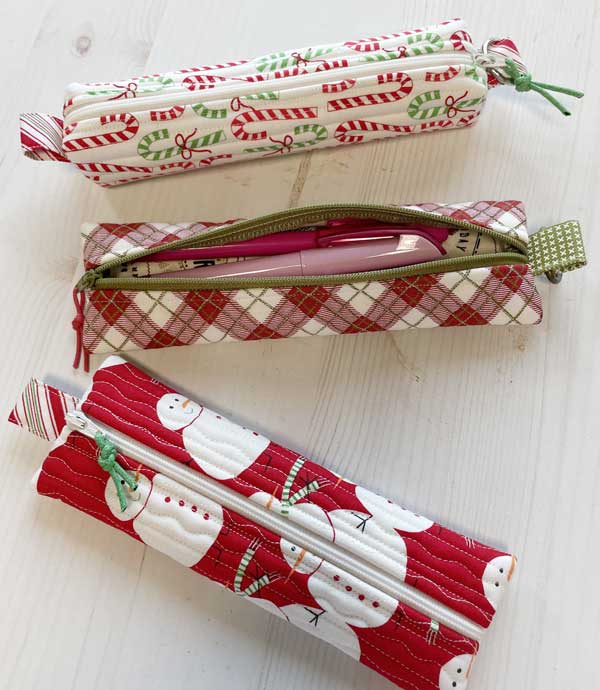
Pencil bags. Tool bags. A go-bag for binding or English Paper Piecing?
Quilt the layers and trim to size as directed. On Step 1 of the pattern, attach the zipper on the long sides of the rectangle instead of the short sides. The assembly is the same through Step 9, just with a long, skinny tube. On Step 10, make the box corners as directed using half the specified measurement. (The measurement in the pattern divided by two - a smaller fraction.)
For a Flat Long Bitsy Box, attach the zipper on the long sides of the rectangle, and assemble the box through Step 9. Zigzag the seams and it's done.
A short length of waxed cording tied for a zipper pull finishes a few of these bags.
Fill a Bitsy with a little trinket or a few pieces of candy for a gift, or attach a tag and use it as a name card holder for a party. Make twenty-five bags, number them and use them as an Advent calendar.
The collections used here are:
- Red Barn Christmas by Sweetwater - the Ring Garland and the plaid Flat Bitsy Box
- Hustle & Bustle by BasicGrey - the square Bitsy Boxes
- Merry and Bright by Me & My Sister Designs - the Snowman and Plaid Flat Bitsy Boxes
- Christmas Morning by Lella Boutique - the gray Flat Bitsy Box
Posted in:
Comments