Welcome to Moda Fabrics!
How to Make Perfect Half Square Triangles (HSTs) – Step-by-Step Guide
How to Make Perfect Half Square Triangles (HSTs) – Step-by-Step Guide
Materials Needed for Making Half-Square Triangles
To begin, you'll need the following materials:
- Fabric Squares or Charm Packs: Charm Packs are pre-cut 5-inch squares of fabric. For this tutorial, we’re using one printed charm pack (Floribunda by Create Joy Project) and one Bella Solids charm pack. You can use any size squares and this method will work well!
- Fabric-Safe Pen/Pencil: Used for marking the fabric.
- Rotary Cutter: For cutting the fabric.
- Pins: Optional, but helpful for keeping fabric in place while sewing.
- Ruler with a 45-Degree Angle: This will help in trimming your HSTs accurately.
- Pressing Mat and Iron: For pressing your seams.
- Sewing Machine: Ensure it's set up with the appropriate thread color to blend with your fabrics.
Step 1: Prepare Your Fabric
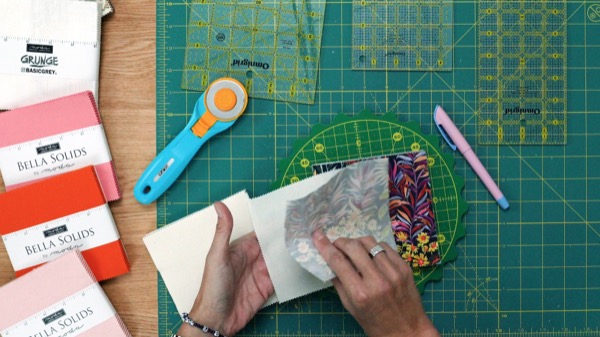
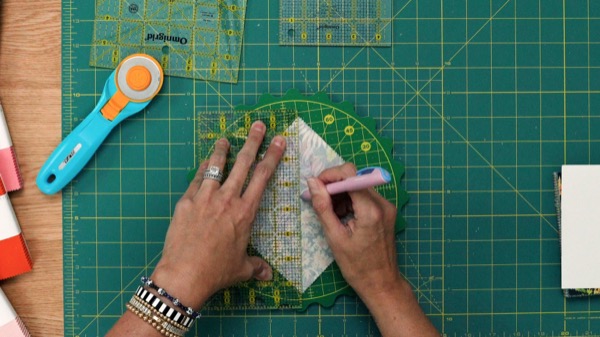
Stat by placing your fabric squares right sides together (the side with the design facing inward). Using your fabric-safe pen or pencil, draw a diagonal line from one corner to the opposite corner. This line will serve as a guide for your seam.
Step 3: Sew Along the Seam Lines
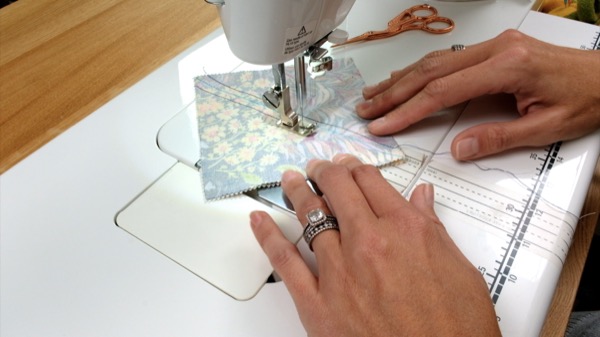
Head to your sewing machine and pin the two squares together along the edges. Sew a quarter-inch seam on each side of the diagonal line you marked. Remember to remove the pins as you sew to avoid damaging your machine or causing injury.
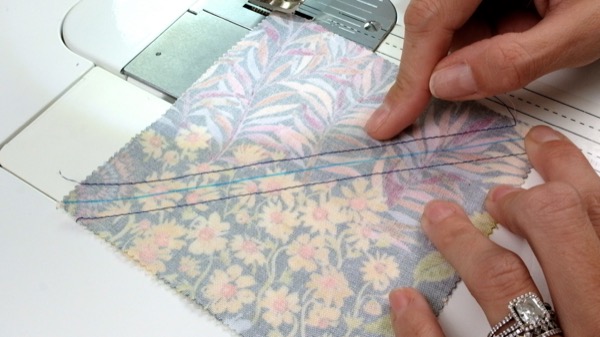
Step 4: Cut the Sewn Together Squares in Half on the Drawn Line
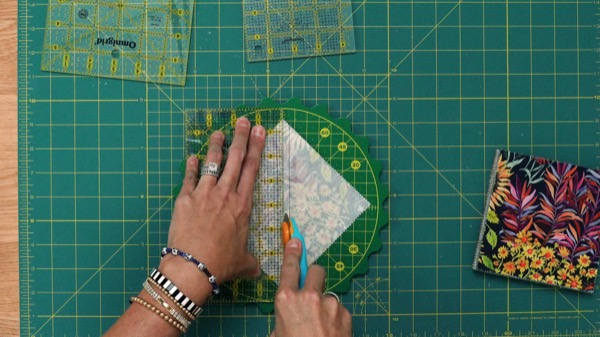
Once your seams are sewn, return to your cutting mat. Using your rotary cutter, cut along the diagonal line that you drew earlier. This will split your fabric into two pieces, each forming a Half Square Triangle.
Step 5: Press the Seams

Press the seams of your HSTs to the dark side of the fabric. This helps prevent the seams from showing through the lighter fabric and gives a cleaner finish. Use your pressing mat and an iron to set the seams.
Step 6: Trim the Half Square Triangles
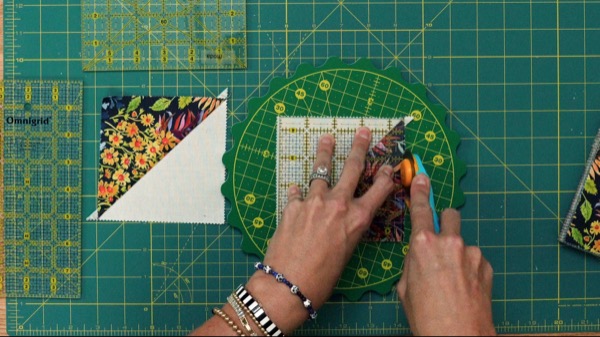
Now, it’s time to trim your HSTs to the correct size. Use a ruler with a 45-degree angle that is the same size or larger than the size you need for your unfinished HST block and align the 45 degreen line with the seam of the front of your HST. Trim the edges on each side to create a perfect square. If you’re using a rotating cutting mat, you can easily turn the mat instead of moving your fabric, ensuring your cuts are precise.
Step 7: Repeat and Enjoy

Repeat the above steps for the remaining fabric squares. Before you know it, you’ll have a collection of perfectly trimmed Half Square Triangles, ready to be incorporated into your quilting project.
Half Square Triangle Sizing Guide Info
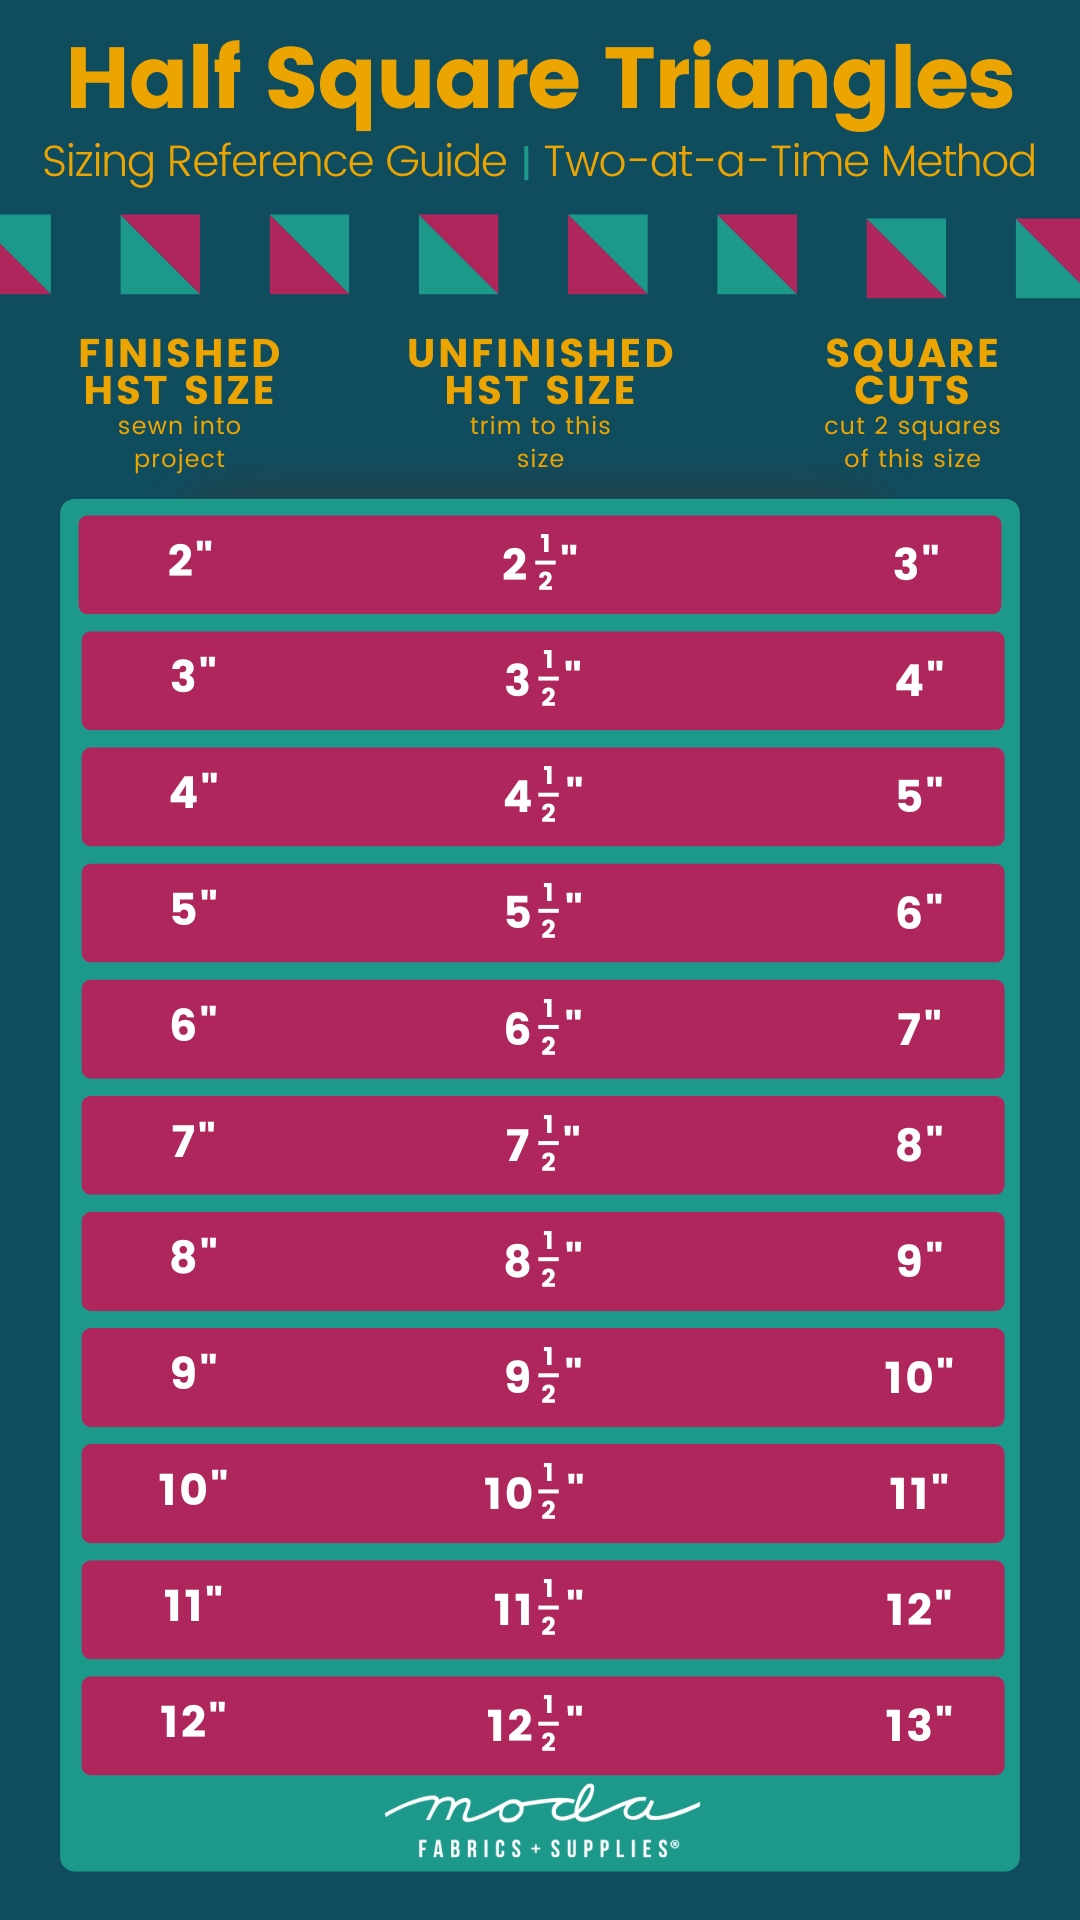
Use this handy HST size guide to make any size of half square triangle you need. A general rule of thumb is to cut your 2 starting fabric squares 1/2" larger than your trimmed (unfinished) HST size!
Have Fun! Happy Sewing!
Making Half Square Triangles doesn’t have to be complicated. With the right materials and a little bit of practice, you'll be creating beautiful quilt blocks in no time. If you found this tutorial helpful, be sure to check out our free Moda Love Project PDF for a beginner-friendly quilting project made entirely from HSTs and charm packs.
Don’t forget to share your HST projects with us on social–we just love to see your creations!
Follow Moda Fabrics for More Fun Content!
Stay tuned for exciting tutorials, tips and inspiration! Follow us on Instagram, Facebook and Youtube to join our vibrant quilting, sewing and crafting community!
- Subscribe to Moda Fabric’s Youtube
- Follow Moda on Instagram
- Follow Moda on Facebook
